November 9, 2026
In this article, we will cover:
- Why Shopify is one of the easiest platforms to integrate with Tapfiliate
- What you need before starting the integration
- Step-by-step setup for both integration types
- Advanced optional features
- Testing and verification
Overview
We offer two options for integrating Shopify with Tapfiliate:- The plug-in integration using the official Shopify app
- The code-based integration using a custom pixel setup
Pros and Cons of Each Integration Method
Shopify App (Plug-in Integration)
Pros:- Easy setup
- No coding
- Recommended for standard Shopify stores
- Automatically tracks clicks and conversions
- Ideal for using one Shopify store with one Tapfiliate account
- Supports one store per Tapfiliate account
- Limited flexibility for custom tracking rules
- Does not support third-party checkouts or external payment platforms (e.g., Fanbasis) as it relies on Shopify’s native checkout system.
Custom Pixel (Code-Based Integration)
Pros:- Allows multiple Shopify stores to be connected to one Tapfiliate account
- Flexible for advanced tracking configurations
- Supports custom commission logic and identifiers
- Requires adding code in Shopify settings
- Incorrect placement can affect tracking
- Off-site or subscription checkouts may require further customization
Prerequisites
To successfully integrate, ensure you have the following:- A live Tapfiliate account with access to your account ID
- Access to your Shopify store’s admin dashboard
- (For custom code setup) Admin permission to add Custom Pixels or code in Shopify settings
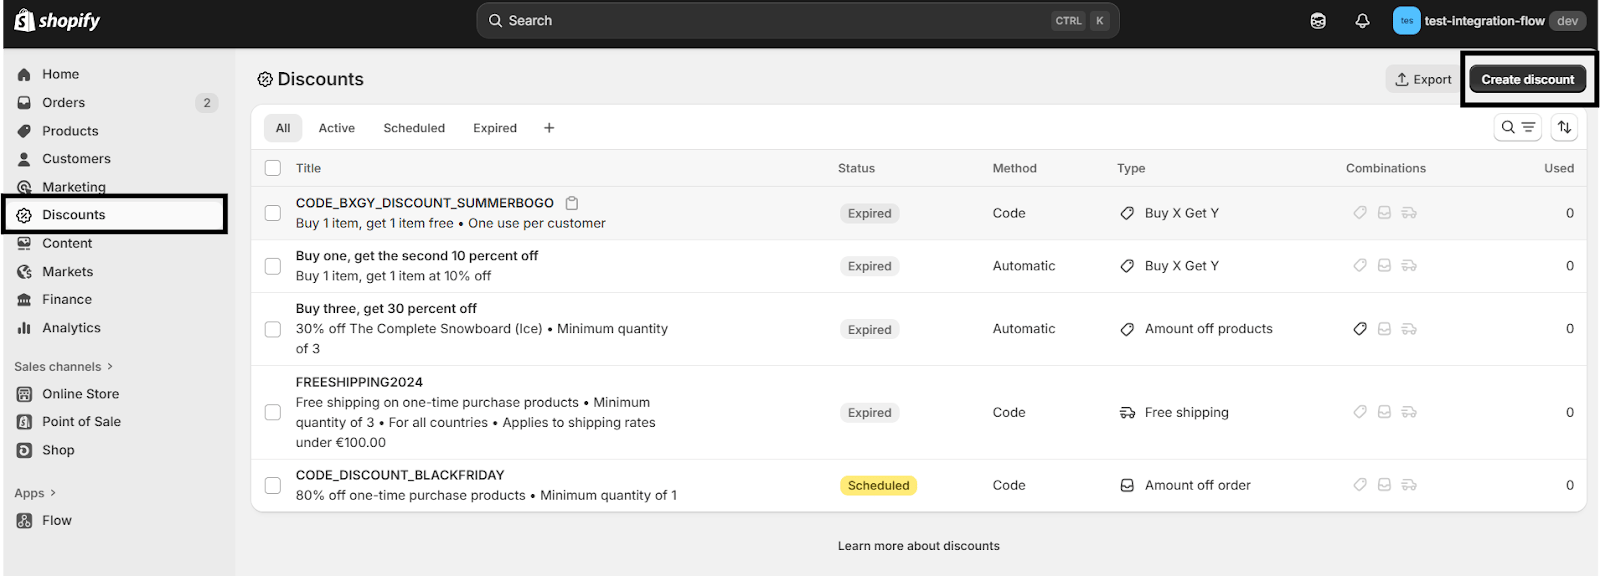
- Any affiliate coupon codes pre-created in Shopify, if you wish to use them for tracking
Initial setup
You can choose either the plug-in setup or the custom pixel setup. Do not use both at the same time.Option 1: Set up plug in Integration
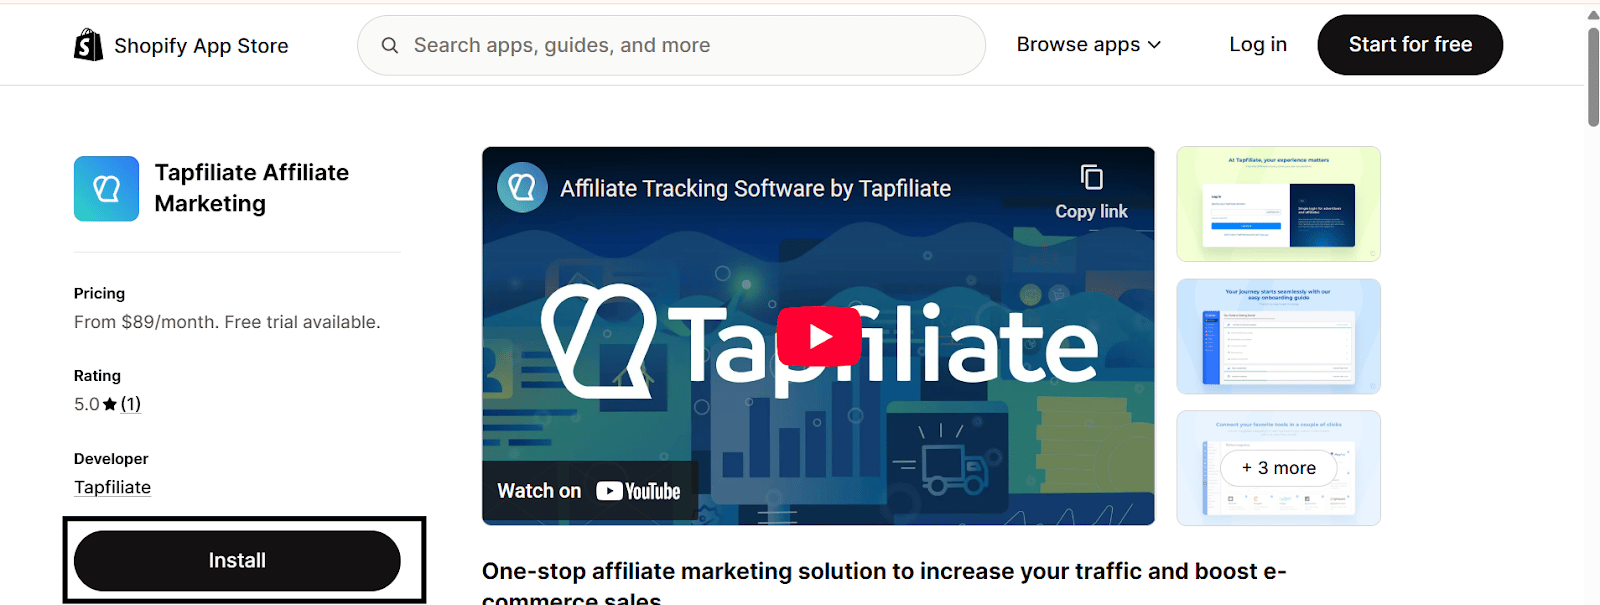
Step 1: Install the Tapfiliate App
Go to Shopify admin > Apps > Visit Shopify App Store > search for Tapfiliate > Add app > Install.Step 2: Connect Your Tapfiliate Account
After installation, the app asks you to create a new Tapfiliate account or log in to an existing one. If you create a new account, approve the Tapfiliate subscription in Shopify: accounts created from the app are billed through Shopify. One Tapfiliate account can be connected to one Shopify store.Step 3: Tracking Starts Automatically
Once your account is connected, the app adds the Tapfiliate tracking pixel to your store. You don’t need to enter your Account ID or add any code. If you used the code-based integration before, first delete that custom pixel (Settings > Customer events > your Tapfiliate pixel > Delete pixel) and remove any older Tapfiliate script from your theme’stheme.liquid file, otherwise clicks are tracked twice.
Option 2: Set up Code-Based (Custom Pixel) Integration
Step 1: In Shopify admin, navigate to:Settings > Customer events > Add custom pixel.
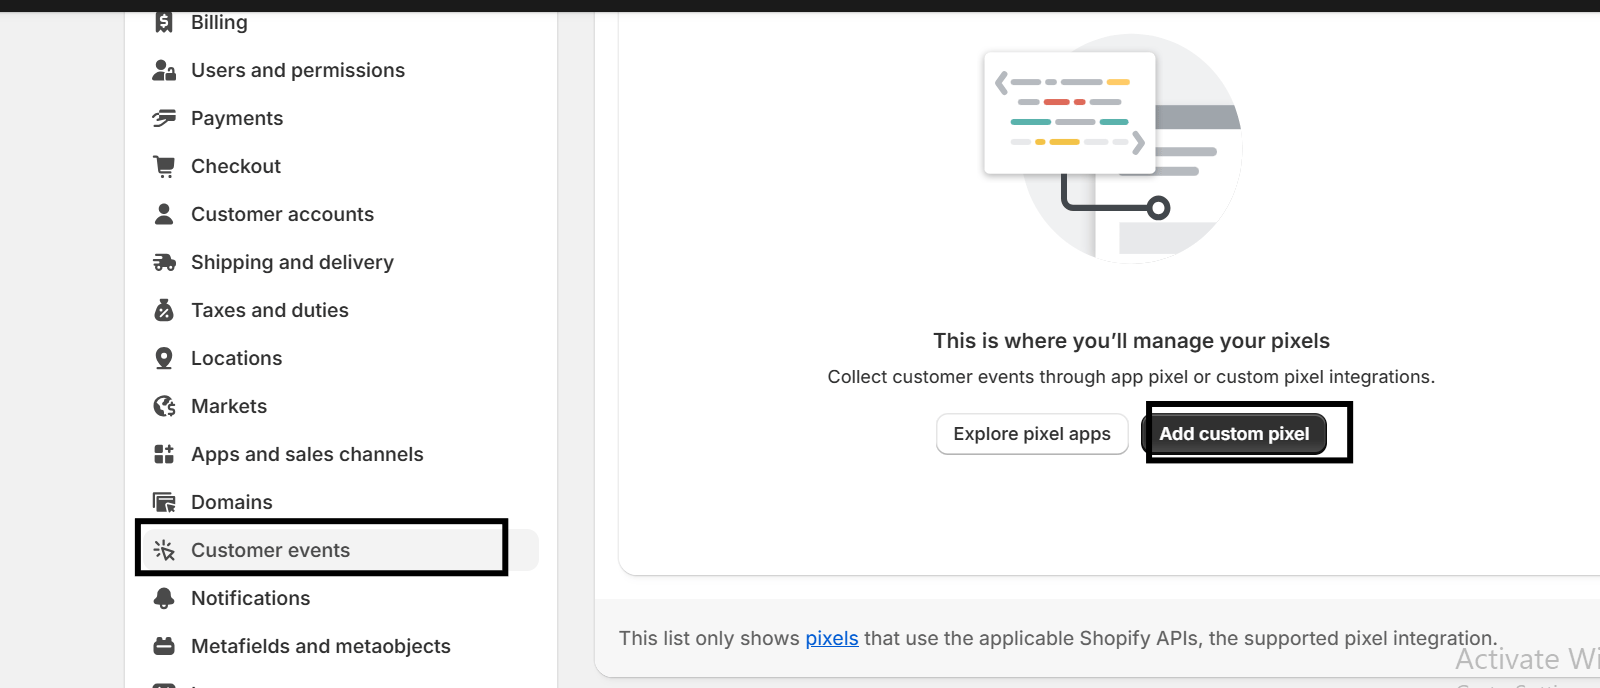
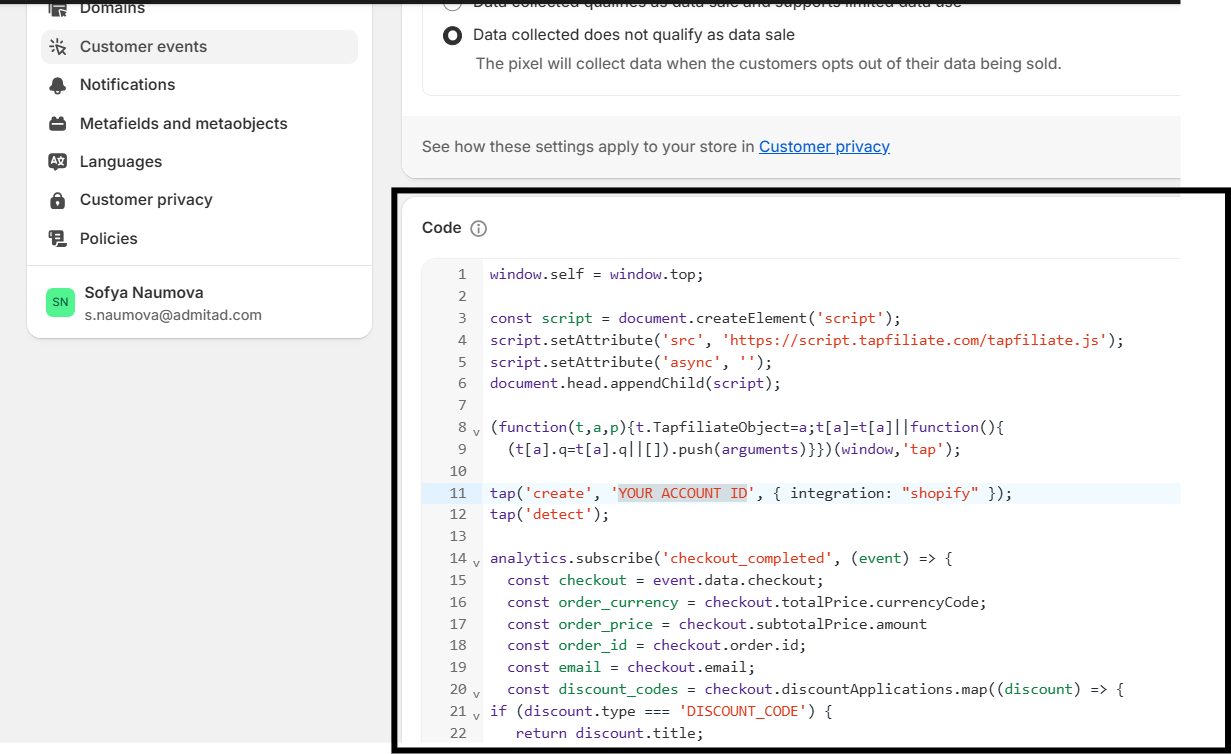
- Set permissions to “Required”
- Check “Marketing” and “Analytics”
- For Data Sale, choose “Data collected does not qualify as data sale.”
Advanced or Optional Features
1. Set up Multiple Commission Types by Product/SKU
You can reward different commission amounts for specific product categories or SKUs. The commission type feature allows you to offer varying commission rates for different products, which can be useful for boosting sales of specific items. For instance, to expedite the sale of a product during a flash sale, you could set a higher commission for that item. To do so, first, create commission type identifiers in your Tapfiliate account. Then, in your Shopify tracking code, pass the identifier as the fifth argument of the conversion call, after the options object, for example:2. Set up Coupon Code Tracking
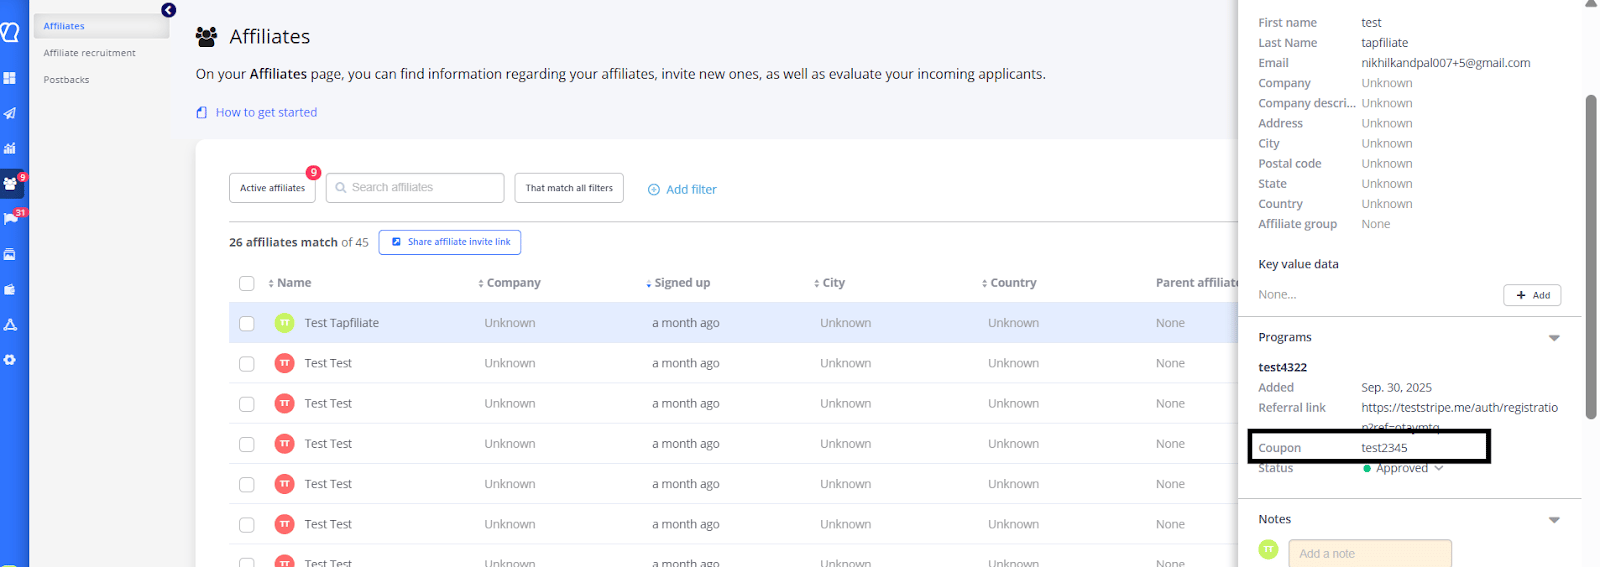
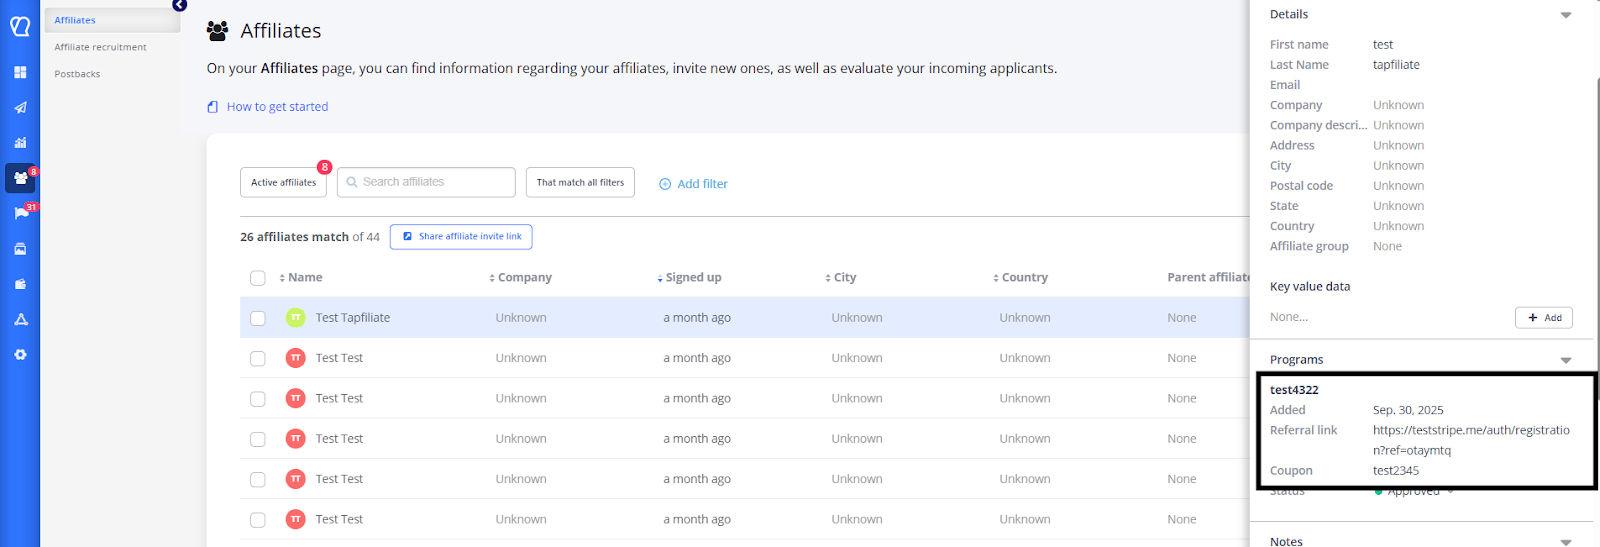
To track coupon code usage, assign unique coupon codes to affiliates within Tapfiliate and ensure they are mirrored in Shopify. When these codes are used during checkout, their usage will be automatically tracked and attributed for conversion credit.In Tapfiliate, each affiliate can be exclusively assigned their own unique coupons. You can directly go to affiliates> click on your affiliate and assign a coupon to them.
3. Tracking Affiliates for a Shopify App
If you are promoting a Shopify App and need to track affiliate-driven activity, Tapfiliate does not offer a direct integration. However, you can use the Tapfiliate REST API to achieve this:- Record Key Events:
- Create a click when an affiliate-driven visit occurs (e.g., when a user lands on your app’s promotional link).
- Create a conversion when a target event happens (e.g., app install, subscription start, upgrade, or other billable actions).
- Map Lifecycle Events: Align your app’s lifecycle events with Tapfiliate clicks and conversions to attribute installs or purchases to affiliates and calculate commissions.
- Follow the REST API Guide: Use the Tapfiliate REST API documentation for details on authentication, endpoints, and payload formats. Replace any store-specific steps with your app’s event triggers and data. This approach allows you to track affiliate-driven activity within a Shopify App, even without a native integration.
Testing and Verification
To verify your Shopify-Tapfiliate integration, follow these steps:- Create a Test Affiliate: Set up a test affiliate account in Tapfiliate.
- Make a Test Purchase: Using the test affiliate’s referral link, complete a purchase in your Shopify store. How to validate your tracking.
- Confirm Tracking: Check the Tapfiliate dashboard to ensure that the click and conversion are successfully tracked.
- Troubleshoot (If Needed): If conversions aren’t appearing, review the installation steps and consult and follow the troubleshooting guide.5. Verify Connection: If you encounter a screen indicating your site isn’t fully connected, double-check that all setup steps for the selected integration method have been completed.
If you have any questions or if something in this guide is unclear, please don’t hesitate to contact us at support@tapfiliate.com. We’re happy to assist!