October 15, 2026
Our Terminology: Throughout Tapfiliate, the term “Affiliate” is used as our universal designation for any partner: a referral agent, publisher, creator or influencer - a promoter who earns a commission by referring customers to your business.
- Options for Onboarding New Partners: Match the Method to the Partner
- How to add New Affiliates to Tapfiliate via Shareable Link and Manual Add
- Adding an Affiliate Manually via Form
- Bulk Import Affiliates via .CSV File
- Switching Programs for Existing Affiliates
- Technical or Bulk Import using API
- FAQ
- Next Steps
This method is for partners who are not yet registered in your Tapfiliate account.
- Invite via Shareable Sign-Up Link
How it works: When a potential affiliate clicks this link, they are taken directly to the Sign-up page (the customized form you created).
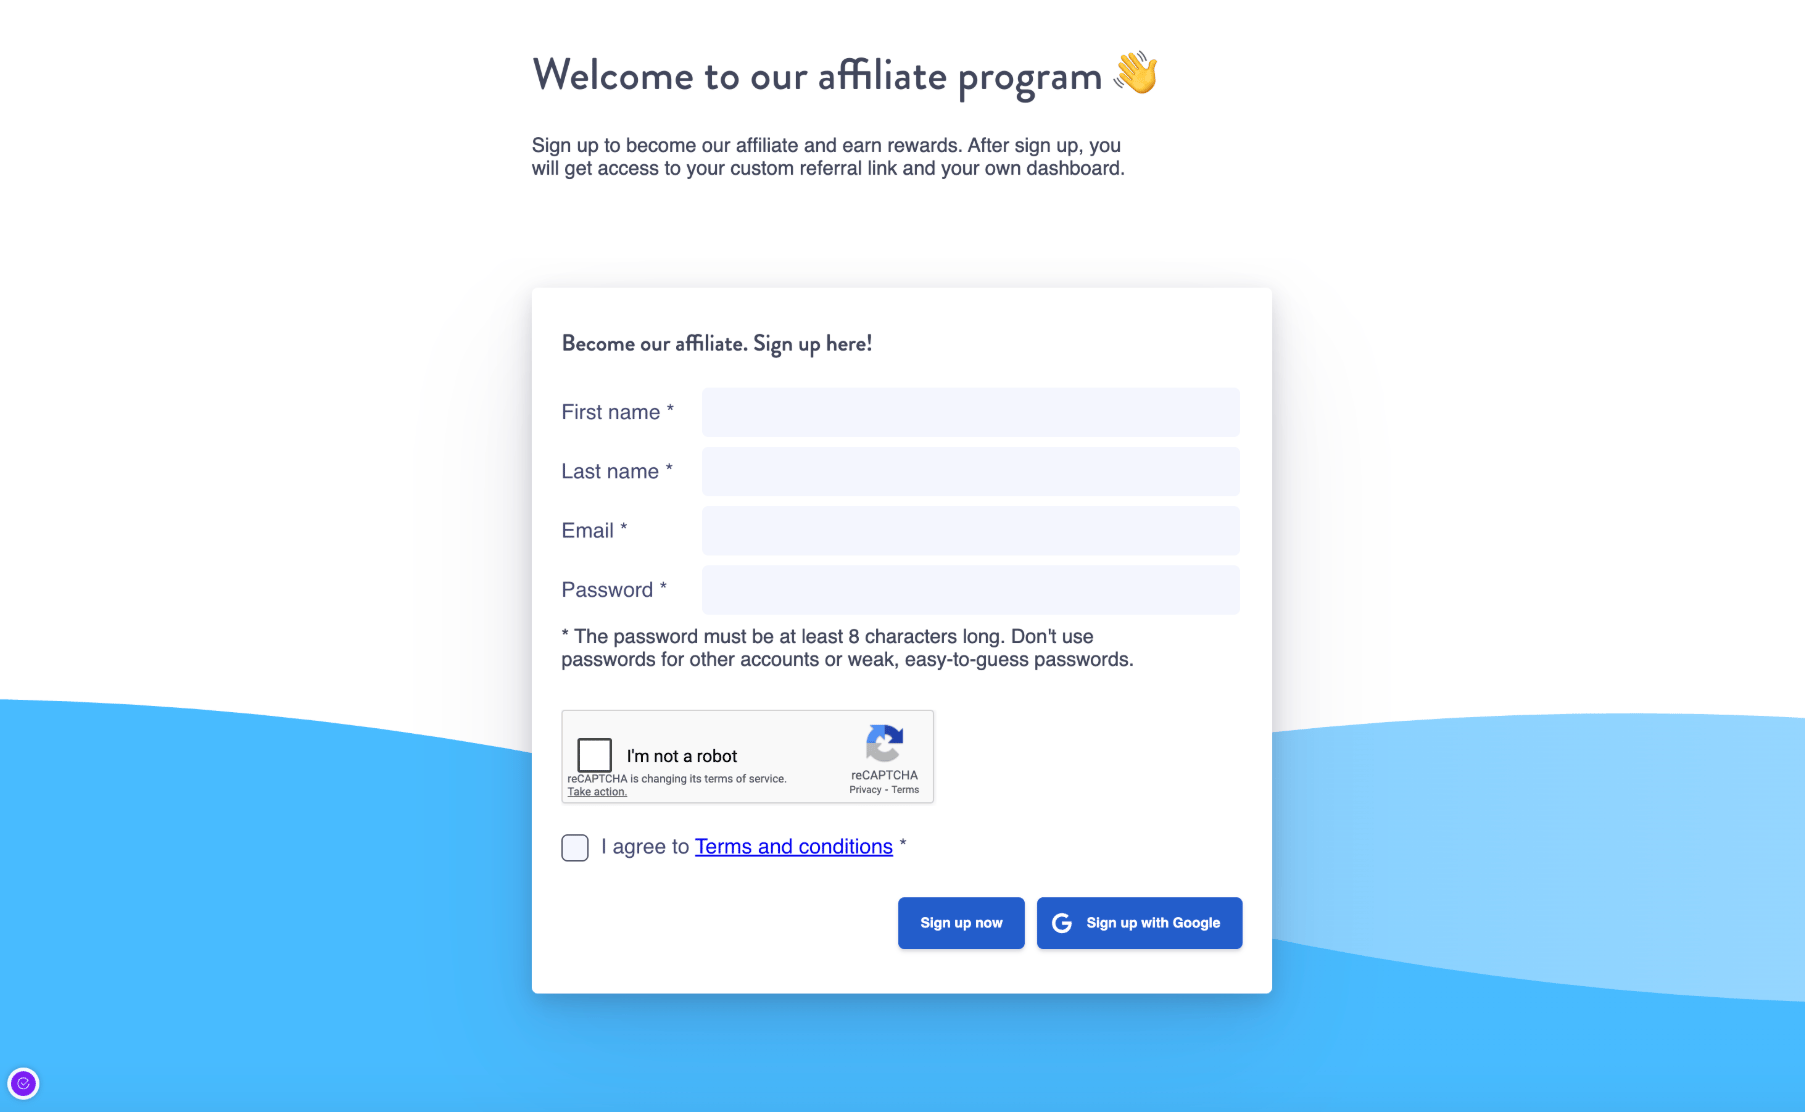
- Find the Link on your Dashboard or retrieve the invite link from your Affiliates Overview.
- Share the link on your social media channels (Twitter, Facebook, LinkedIn) using the provided buttons, or embed it in your email signature, newsletters, or website footer.
- Manually Add or Bulk Import
- Go to your Affiliates Overview page.
- Click on New Affiliate in the top right corner.
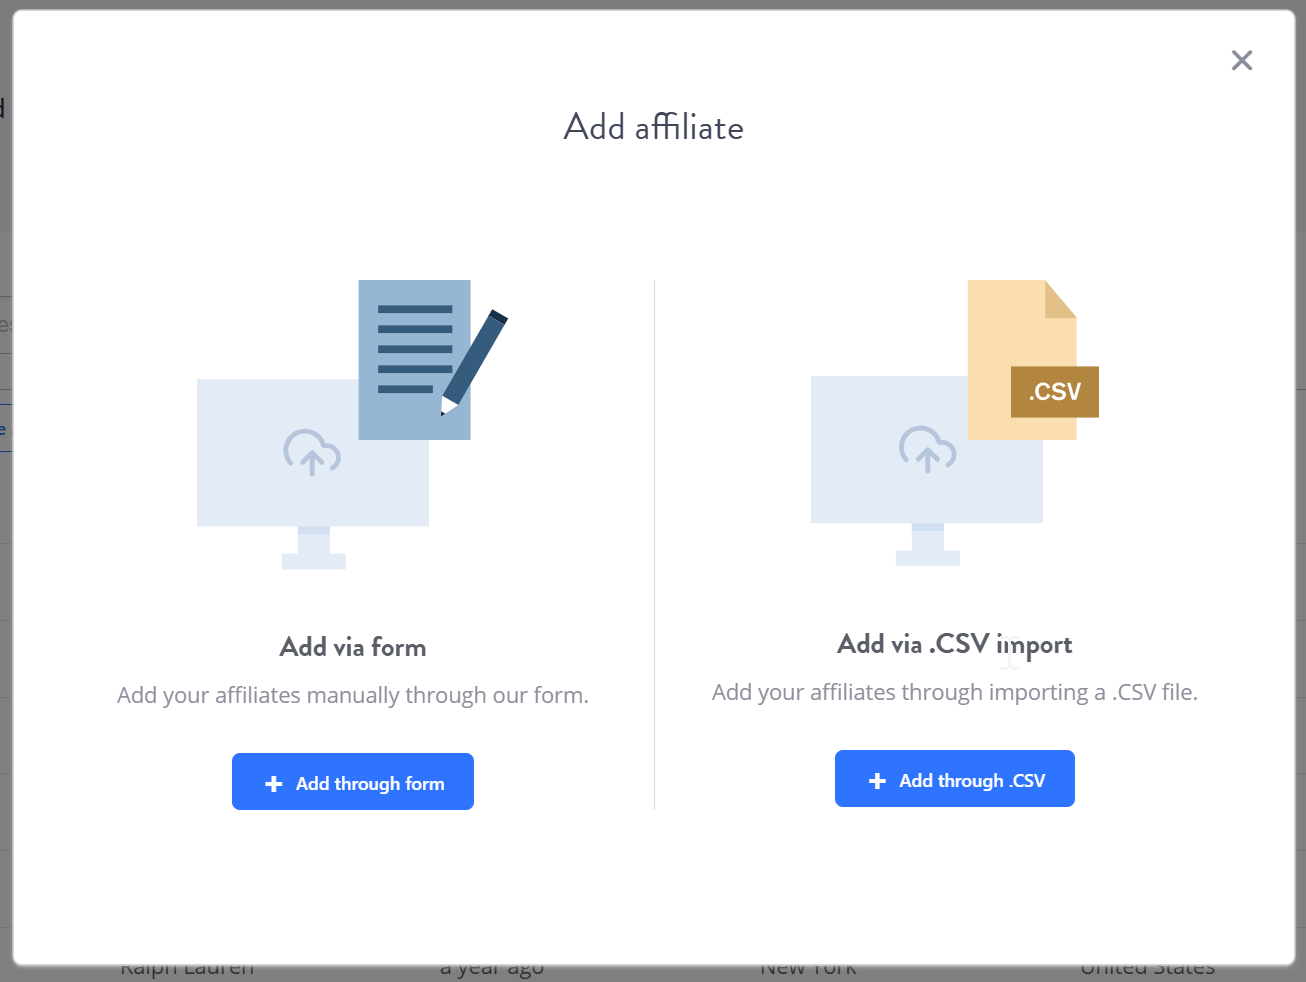
- Choose one of the two options in the pop-up window:
- Add via Form: Fill out the details manually.
- Import affiliates via .CSV file: Use a spreadsheet file for bulk import.
Custom Welcome Email: You can fully customize and personalize thу welcome email sent to the affiliate by following our guide: How to create your own welcome email for the affiliates.
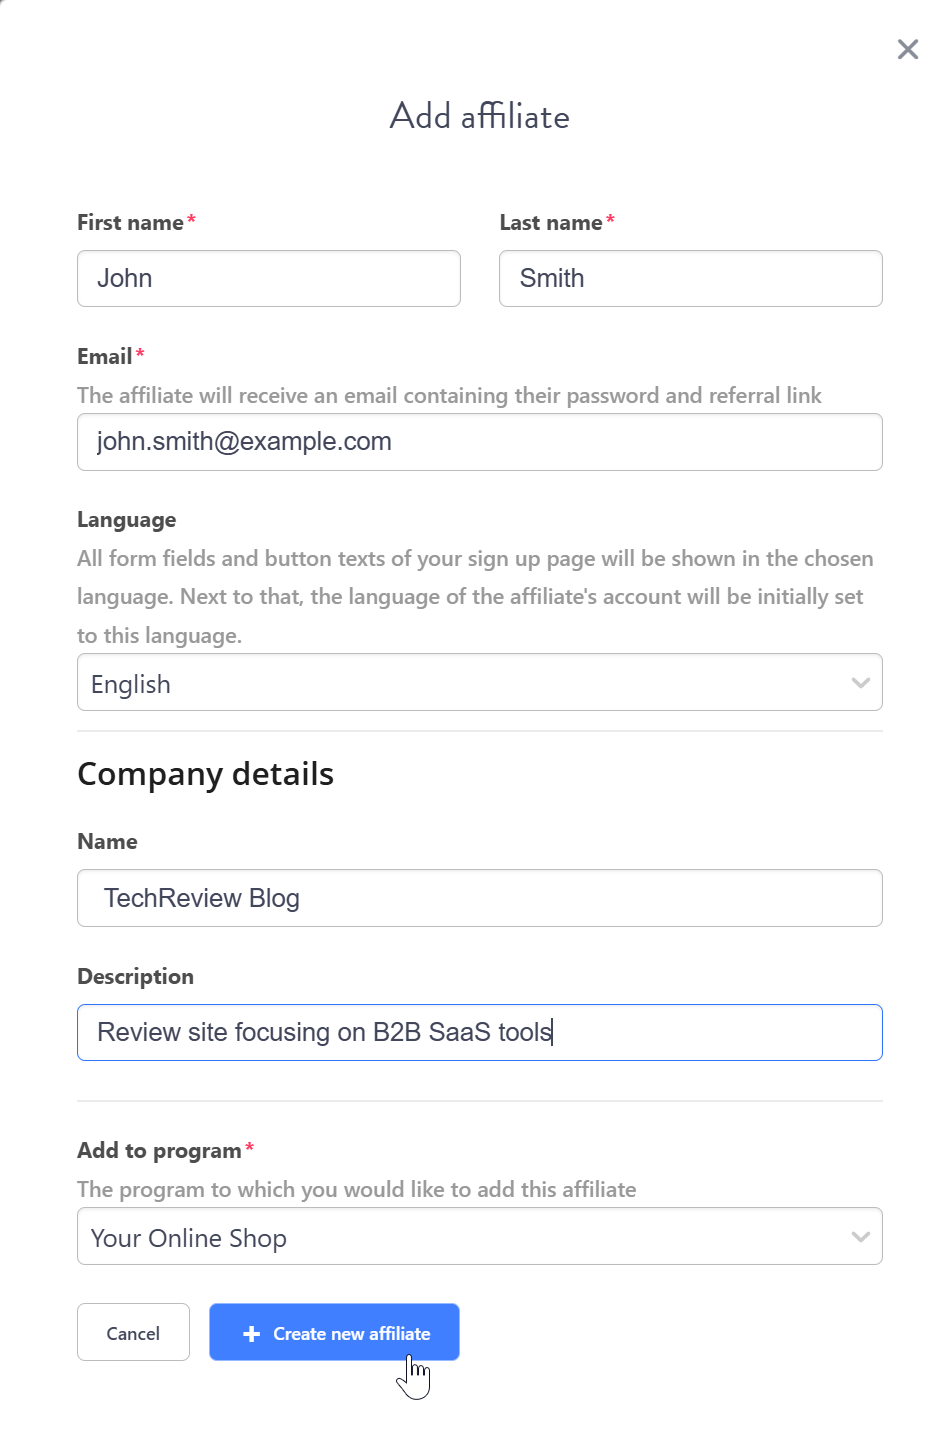
Step 1: Affiliate’s Personal Details
Fill in the essential information needed to create the account:
Step 2: Company Details (Optional)
These fields are optional but are highly recommended for internal organization and tracking within your dashboard.
Usage Note: Although optional, the Company Details fields are crucial for advertiser management. They act as a permanent, searchable reference for what the affiliate does, helping you quickly identify them later for segmentation (Affiliate Groups) and filtering within your dashboard. Both you and the affiliate can view this information.
Step 3: Program Assignment (Required)
Step 4: Finalize and Create
- After filling out all required fields, click “Create new affiliate”.
- The system will instantly create the account and send the welcome email to the affiliate.
Step 1: File Preparation
Prepare your file in .CSV or Tab-Delimited (.TXT) format. The file must contain specific columns to ensure accurate import.
Required Columns:
For every affiliate, you must include:
- First name
- Last name
You can include these optional columns for more detailed account setup:
- Password
- Company name
- Address one, Address two
- Postal code, City, State, Country code
- Coupon
This step ensures your data fields are correctly identified by Tapfiliate.
- Upload File: On the Import Affiliates page, click Drop file or browse and select your prepared CSV file.
- Review Data: Tapfiliate will immediately show you a preview of your data.
- Verify Headers: Check the box “First row contains column headers” if your CSV file includes a header row. This prevents the first row from being imported as an affiliate.
- Map Columns: The system automatically matches your column names (e.g., “Email”) to the correct Tapfiliate field (e.g., “Email*”).
- Manual Mapping: For any column that is not matched automatically, use the dropdown menu to manually select the correct Tapfiliate field or choose “Don’t import” to skip that column entirely.
- Click Next step.
This final step completes the import process and handles initial communication.
- Assign Program: Select the specific program to which you want to import these affiliates.
- Send Welcome Email: Choose “Yes” if you want the system to send a welcome email containing their temporary password upon import, or “No” if you prefer to send your own custom communication later.
- Click Start Import. The system will create the accounts and send notifications if you selected “Yes.”
Switching Programs with Batch Management
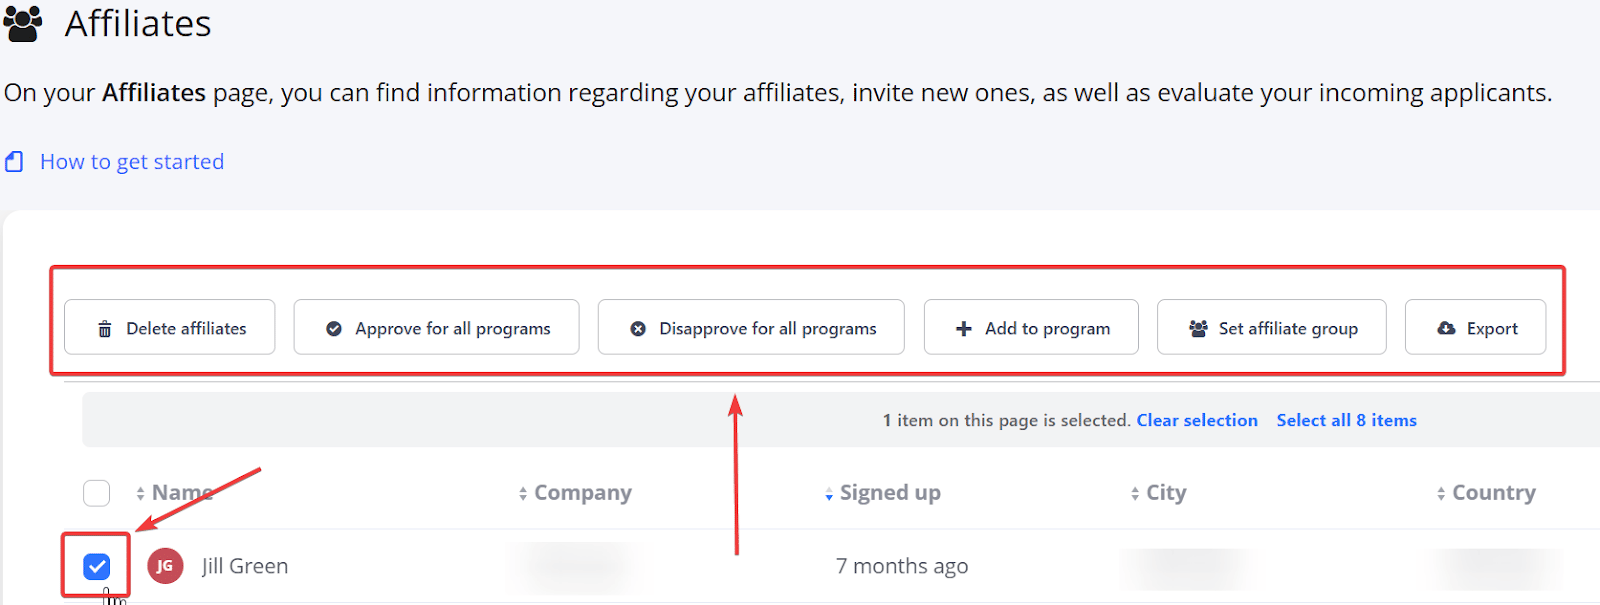
The Batch Management feature makes it easy to manage affiliates and conversions across your account with just a few clicks. You can use this feature on the Affiliates Overview page.
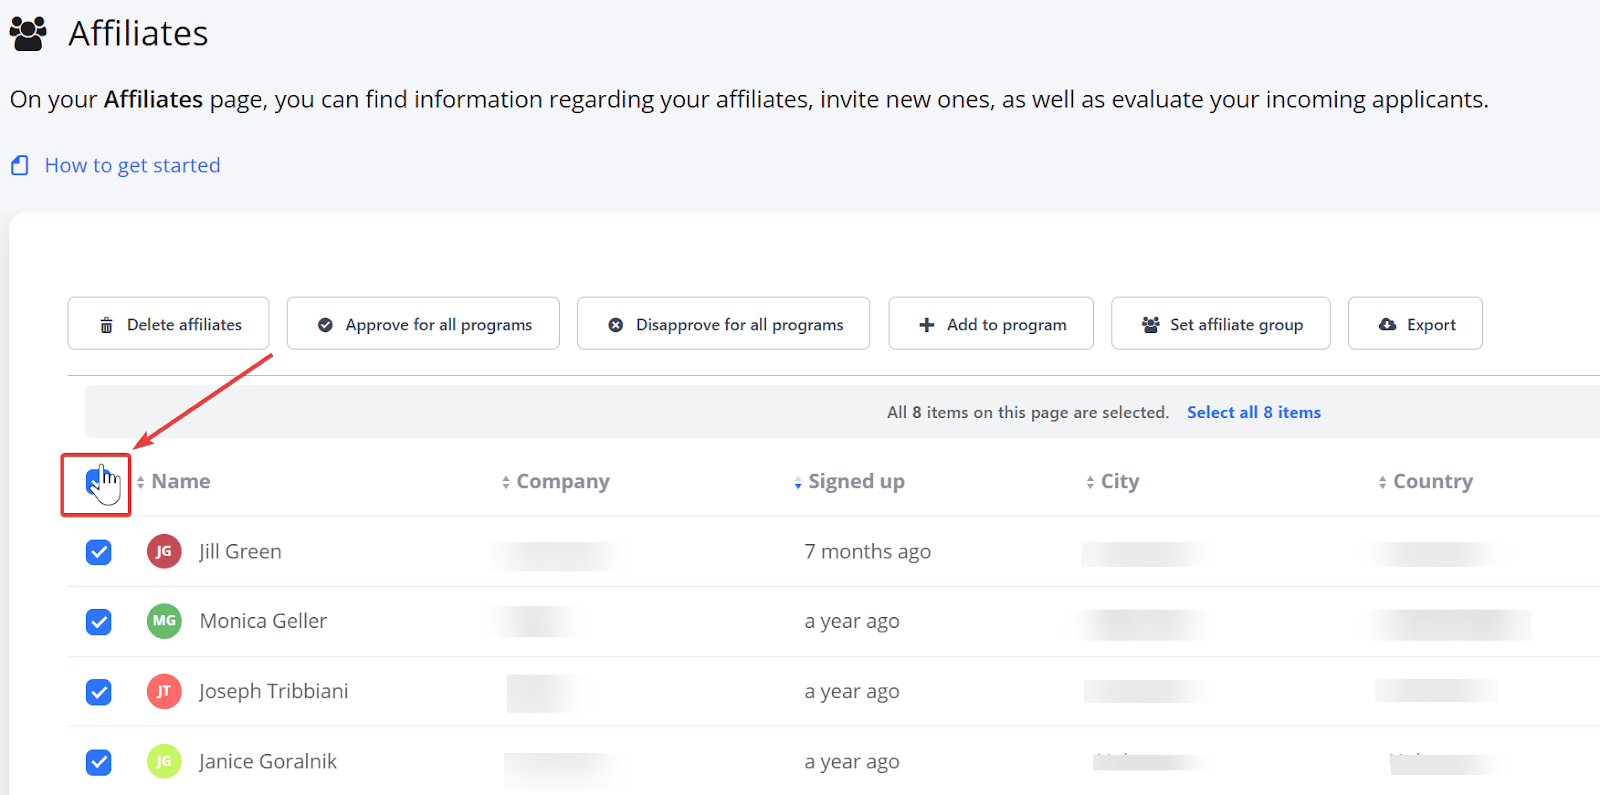
- On the Affiliates Overview page, check the box next to one or more affiliates.
- A menu will appear at the top, offering options to approve, disapprove, set an affiliate group, export, or add the affiliate to the program.
If you have multiple programs enabled, note the following:
- Batch Approve/Disapprove
- Program-Specific Editing
Pro Tip: Changing Referral Codes Affiliate links are created using 7 random symbols, but it’s very easy for them to change their referral codes in their accounts. This option is for program managers or developers who need to integrate affiliate recruitment directly into their own platform, CRM, or app, allowing for automation and scale. Using the REST API gives you advanced control and power over your affiliate onboarding process:
- Seamless Integration: Automatically create an affiliate in Tapfiliate the moment they sign up on your main website (e.g., your partner hub or internal dashboard).
- Scale and Volume: Quickly onboard hundreds or thousands of partners at once, which is essential for rapidly growing programs.
- Custom Logic: Implement custom recruitment flows or integrate with internal HR/Partner Management systems.
How to Onboard Affiliates via REST API
This is a two-step technical process that your developer will need to handle.What to Send to Your Developer
If you decide this is the right method for your program, send your developer these two primary resources:- The Goal: Inform them that you need to automate the creation of affiliates in Tapfiliate.
- API Documentation: Direct links to the relevant endpoints:
- Create the Affiliate – This step generates the affiliate ID. Click here for detailed instructions on creating an affiliate.
- Add the Affiliate to a Program – This crucial step generates the affiliate’s unique referral link (unique per affiliate, per program). You can retrieve the link from the API response. Click here for detailed instructions on adding an affiliate to a program.
FAQ
❓ How do I re-send an affiliate their password reset email?
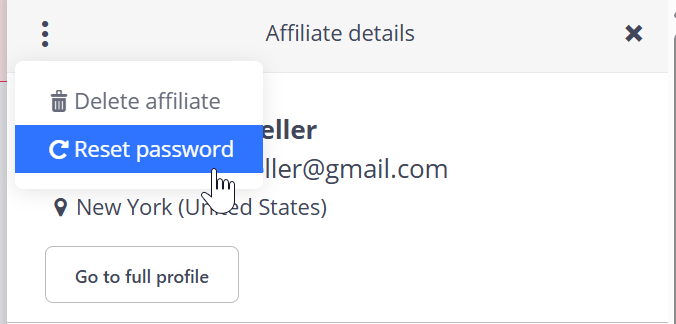
If an affiliate needs help logging into their account, you can quickly launch a message containing a temporary password directly from the platform.- Click on the affiliate’s name in the Affiliates Overview to open the side panel.
- Click on the three dots () at the top of the side-panel.
- The option to Reset Password is located here.
❓ How to Create Affiliates through Zapier
To create new affiliates and add them to your program using Zapier, the following actions must be sequenced correctly:- Set an action in your ‘X’ platform/app (e.g., New Customer in Stripe).
- Use the Find/Create Affiliate action (make sure to check the box for creation).
- Use the Add Affiliate to Program action.
❓ Will a new referral link be created if I add an affiliate to a new program?
Yes. When an affiliate is added to a new program, a new referral link is automatically generated specifically for that program.❓How can I change an affiliate’s commission rate without generating a new referral link?
A: To change an affiliate’s commission rate without changing their existing link, you should use the Affiliate Groups feature. Simply add the affiliate to a different group that is configured with the desired (higher or lower) reward rate.‼️Single Sign-On (SSO)
- If you are using Single Sign-On (SSO), your developers can use a specific guide to set up automatic affiliate creation upon login.
Still need help?
If you have any questions or if something in this guide is unclear, please don’t hesitate to contact us at support@tapfiliate.com-we’re happy to assist! You have successfully learned how to invite partners to your program.- Next: Learn how to Approve or reject applications from your new partners.
- After that: See how to efficiently Set affiliate groups to manage different commission tiers.