November 9, 2026
- Why a Welcome Message is Essential
- How Tapfiliate Supports Communication
- Communicating Based on Status
- Step-by-Step Guide
- 1. Navigate to Dashboard Settings
- 2. Add Welcome Messages
- 3. Save Your Messages
- 4. How to Preview Your Messages in the Affiliate Portal
- Next Steps
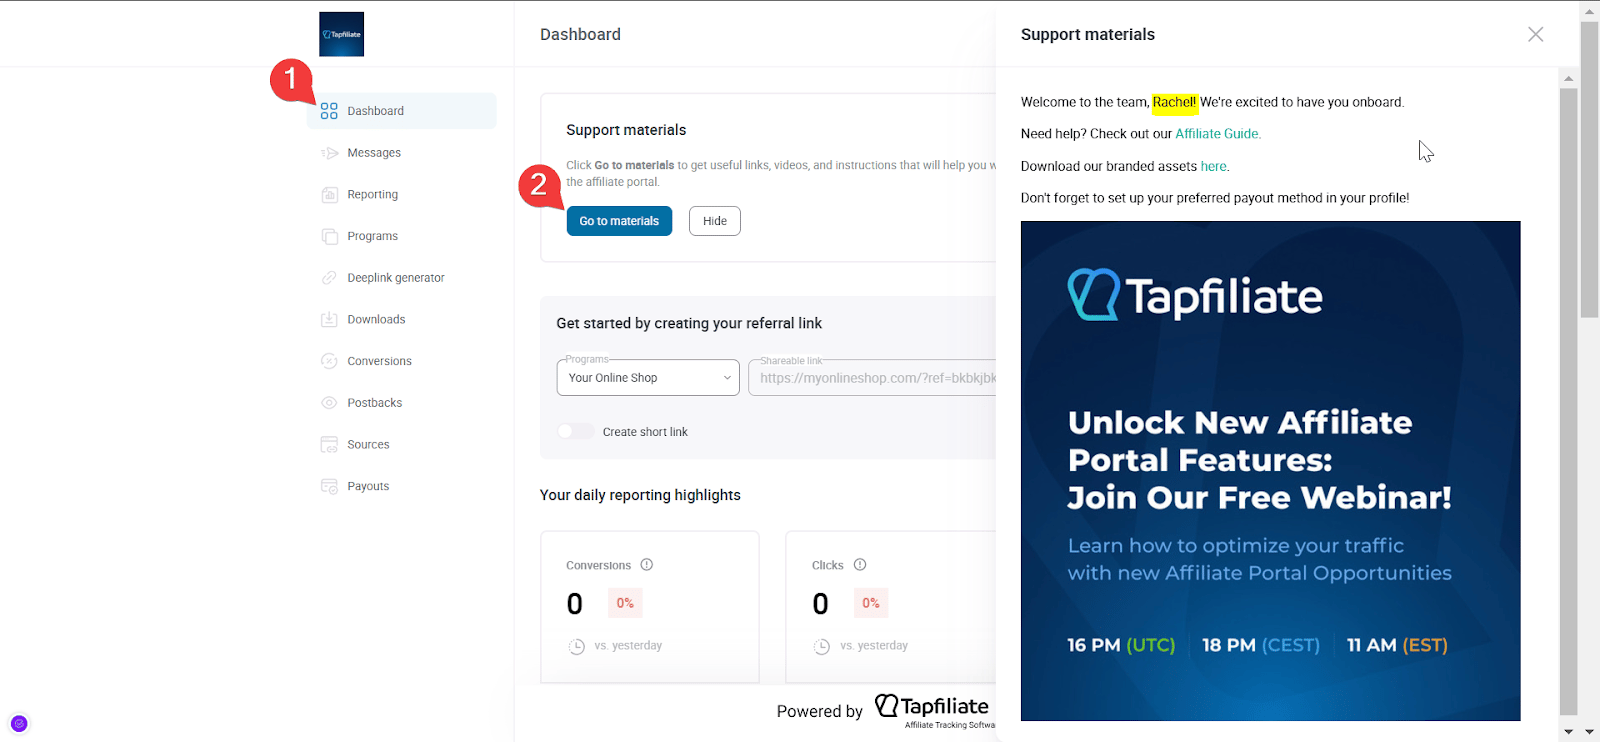
- Increased Affiliate Activation: Affiliates who immediately understand the next steps and where to find resources start promoting your products faster.
- Reduced Support Load: By providing links to FAQs and key instructions upfront, you reduce the volume of repetitive support tickets and save your team time.
It is crucial to adjust your Welcome Message based on the affiliate’s status:
Adding a welcome message is the best way to direct your affiliates to key resources (like your affiliate guide or asset library) immediately after they sign up or are approved.
1. Navigate to Dashboard Settings
- From your main dashboard, go to the Settings menu.
- Under Affiliate Portal, select Dashboard.
2. Add Welcome Messages
On the Dashboard page, you will see two main message boxes, allowing you to tailor your communication based on the affiliate’s status:- Welcome message: This message is seen only by partners whose application has been accepted.
- Welcome message for pending affiliates: This message is seen by users waiting for manual approval.
- Hover over the message field, click the
+icon, and choose from options to add links, visuals, or video content.
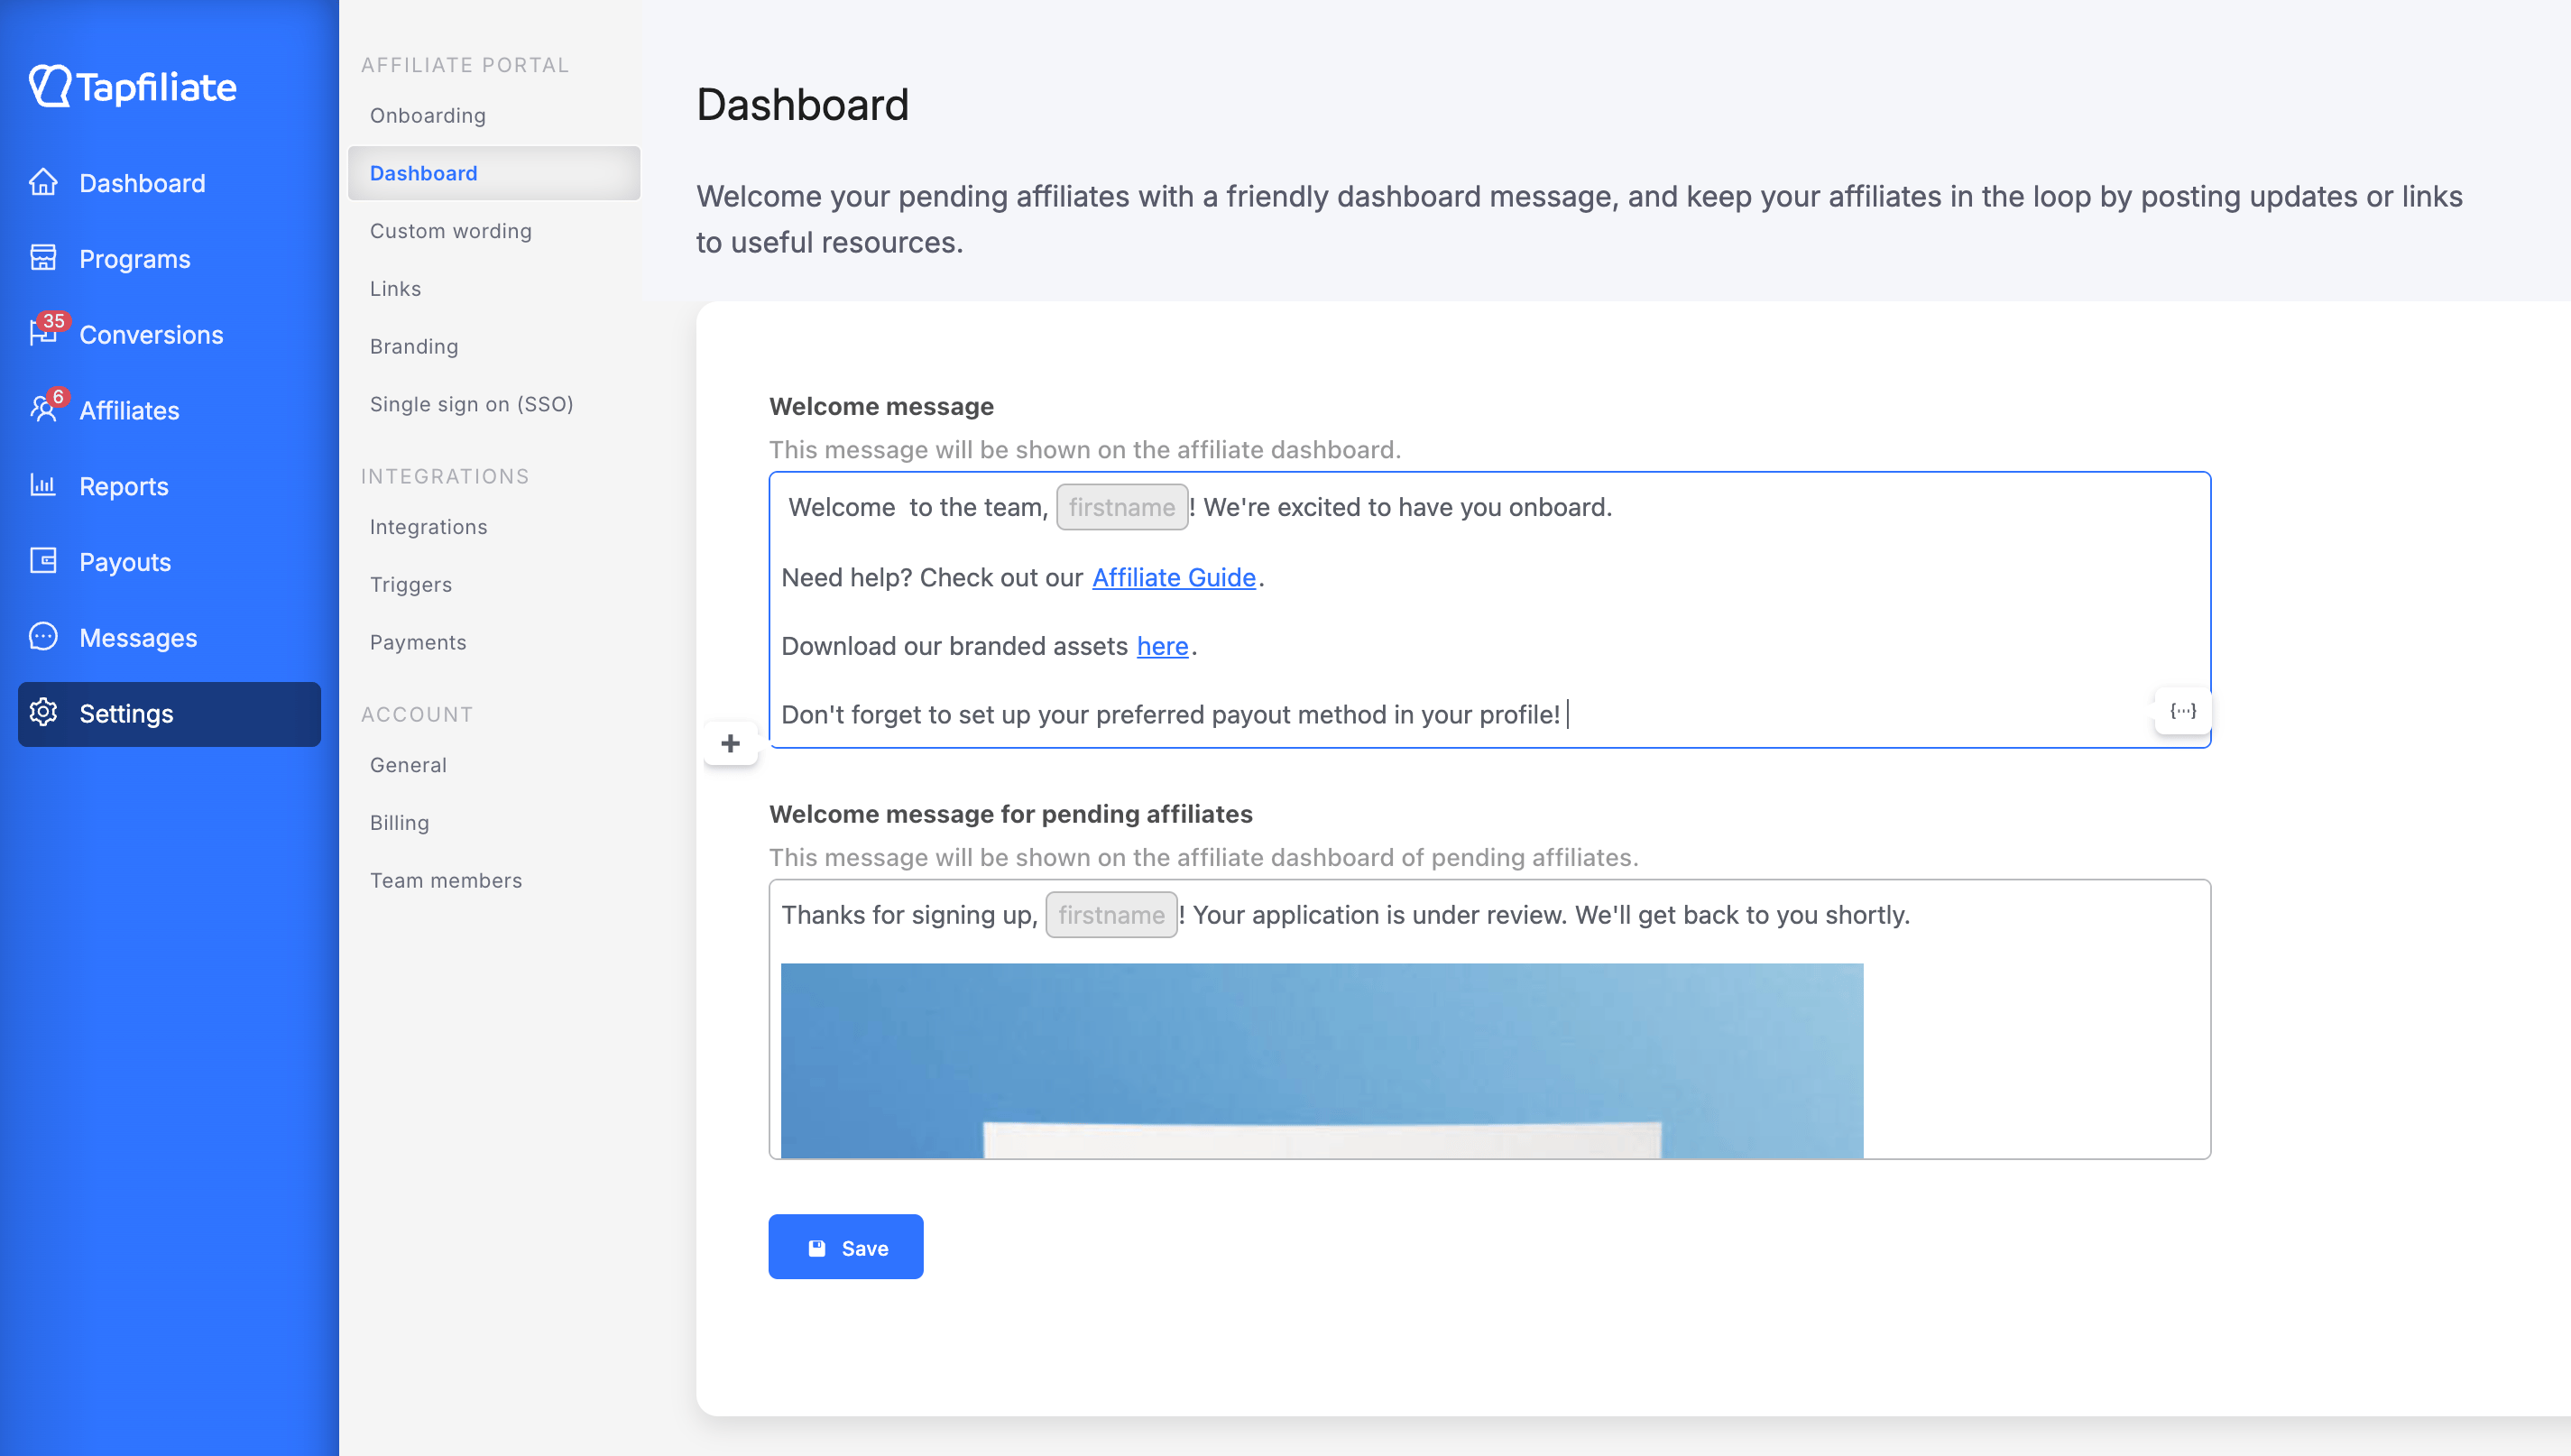
The table below provides examples of different Message Types and shows you how to structure the content for the specific audience (Who Sees It). Use these examples to inspire your own custom welcome flows!
3. Save Your Messages
Once you’ve added your messages and links, click Save at the bottom to apply the changes.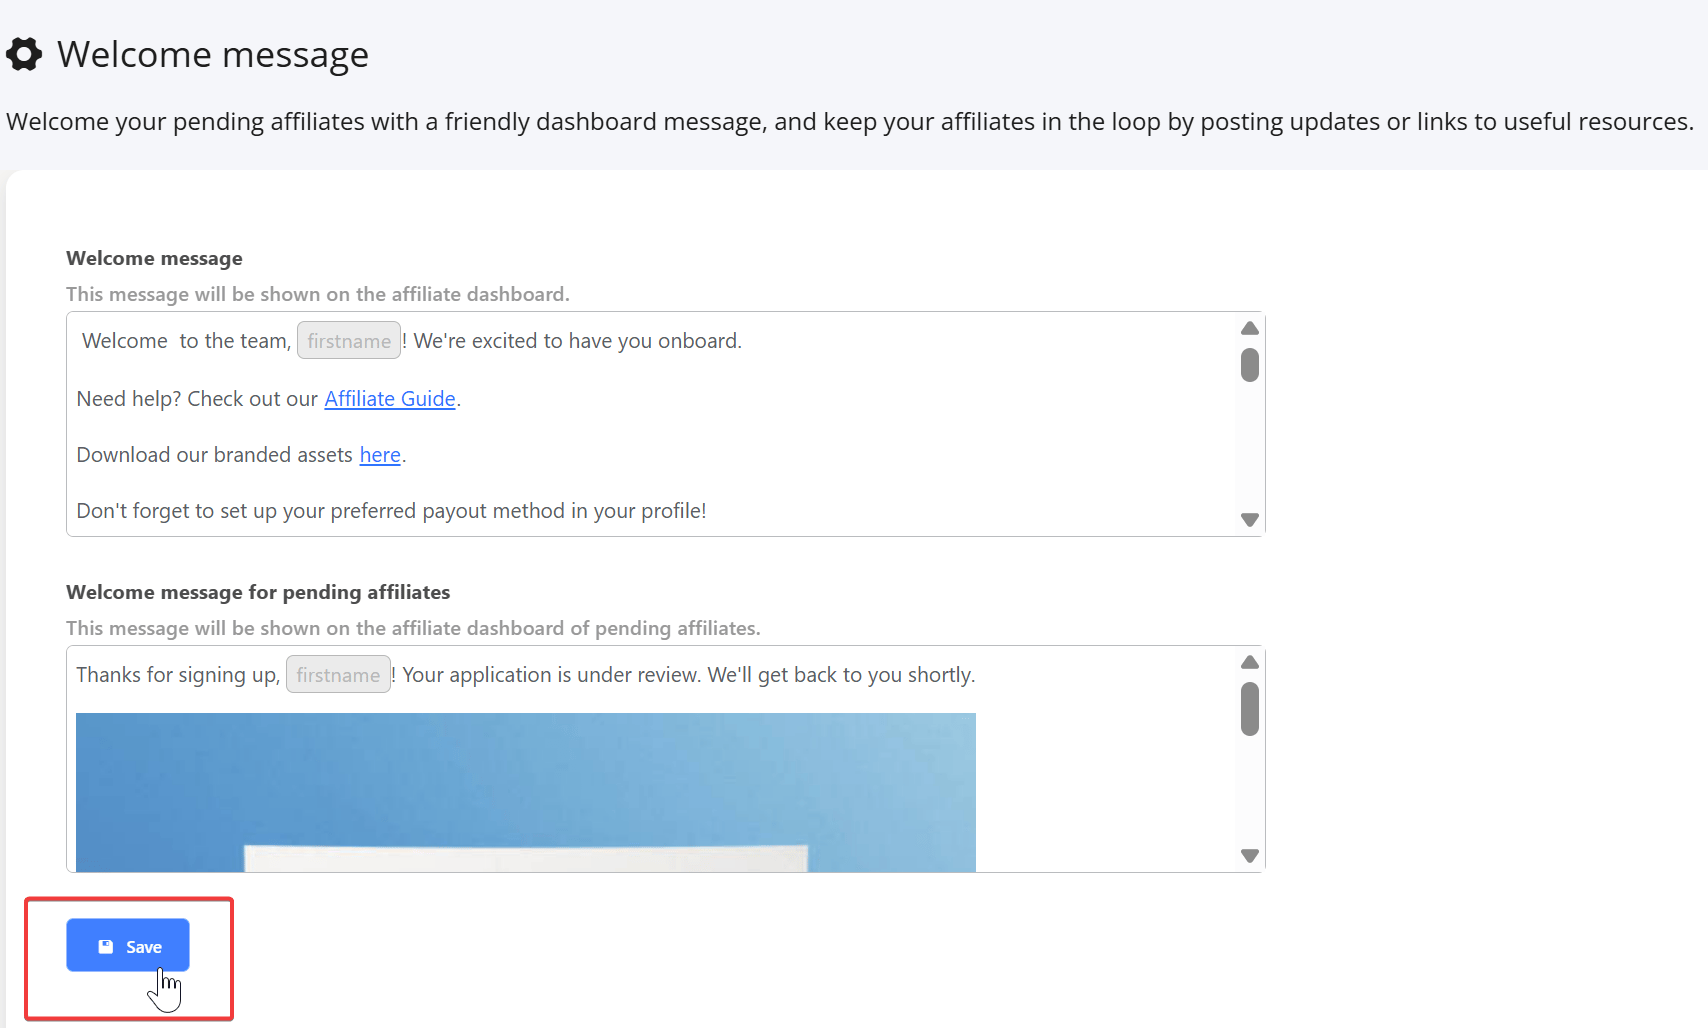
4. How to Preview Your Messages in the Affiliate Portal
You can always check how the message looks by logging into the Affiliate Portal as a test user to ensure the messages and links display correctly.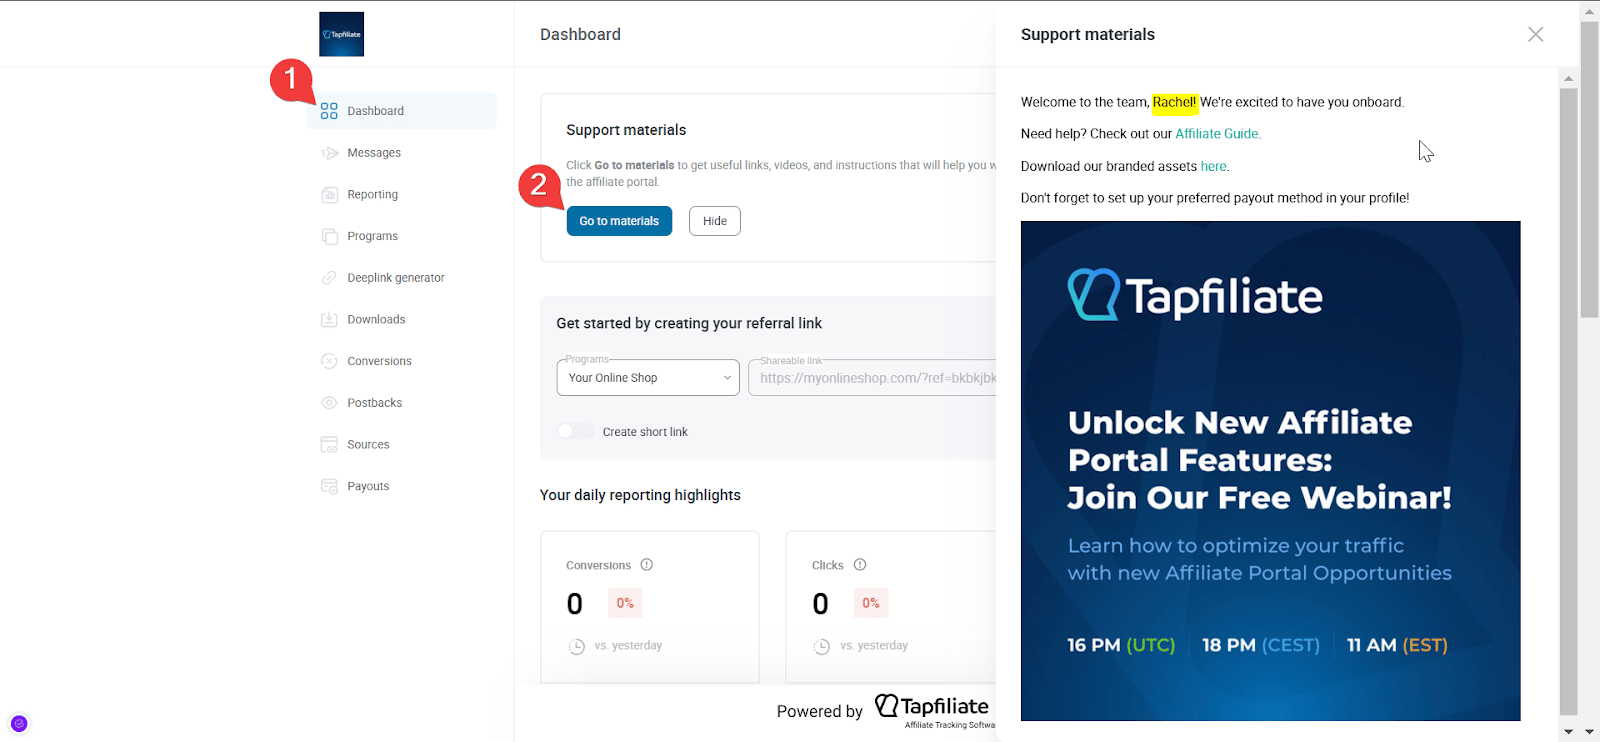
Next Steps
You have successfully customized the affiliate portal with your new Welcome Messages. The next crucial steps for the Brand/Advertiser focus on turning your registration flow into an active channel:- Finalize Affiliate Screening: Before partners start promoting, ensure you have a clear process for accepting new applications.
- Article Link: How do I approve or reject affiliate applications?
- Automate Communication: Send official, branded notifications to partners once their application is reviewed.
- Article Link: How to create Welcome email for your affiliates?
- Equip Your Partners: Provide the necessary tools so approved affiliates can start driving sales immediately.