January 16, 2026
- Introduction to Automated Payouts with Trolley
- Step 1. Enable automated payouts
- Step 2. Set up a Trolley account
- Step 3. Payment methods in Trolley
- Step 4. Set up the integration with your Trolley account
- Step 5. Set up invoices and/or W-9 forms (optional)
- Step 6. Affiliates set up a payout method (affiliate guide)
- Step 7. Making payments
- FAQs
Trolley is a third-party platform that allows you to automate your affiliate payout process. Tapfiliate offers a native integration with Trolley, making it easy to connect the two platforms. The option is available for Tapfiliate customers starting Scale plan after the 1st subscription payment (not available during the trial period). Once connected, all settled balances in Tapfiliate will be sent to your Trolley account. In Trolley, you can link either a bank account or a PayPal account to handle payments. When Trolley receives information from Tapfiliate about approved balances and new affiliate payment details, you can manage the payout process directly in your Trolley account. This includes confirming the amount to be sent to each affiliate before the payments are processed. Follow these steps to set up automated payouts:
- Enable Trolley in Tapfiliate
Activate the Trolley integration within your Tapfiliate account. - Set up your Trolley account
Create a Trolley account and add your company details. - Link your accounts
Connect your Tapfiliate account to Trolley. - Add an automated payment method in Tapfiliate
Choose either Bank Transfer (Automated Payment) or PayPal (Automated Payment). - Collect affiliate billing details
Ask your affiliates to provide their payment information in Tapfiliate and select their preferred automated payment method. This done on Tapfiliate side. - Process payouts
When you’re ready to settle balances, submit the payment information to Trolley and complete the payout.
Trolley cannot support businesses in the following categories:
- MLM (Pyramid Schemes / Direct Selling companies)
- Firearms
- Cannabis / CBD
- Gambling
- Cryptocurrency
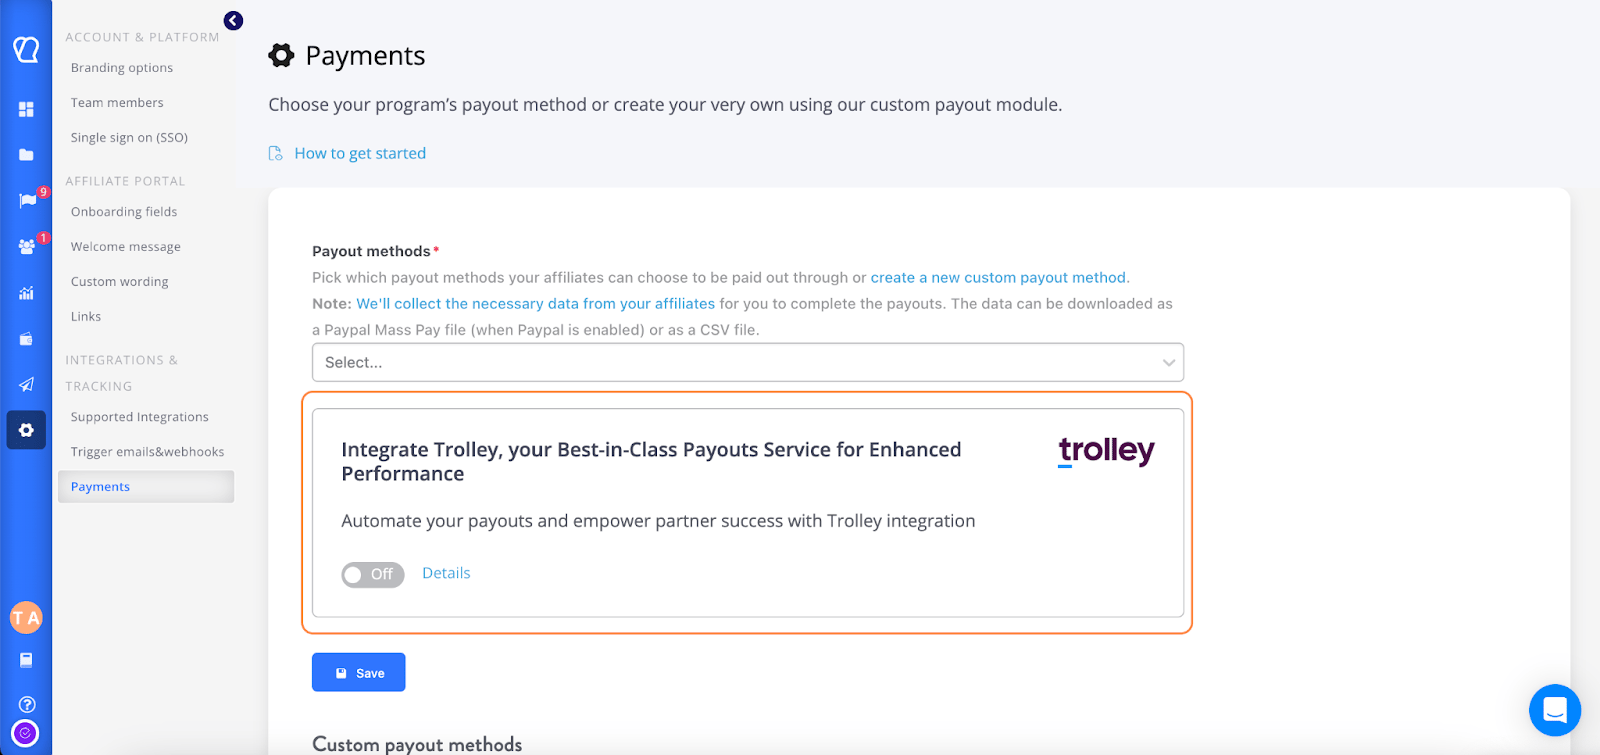
Please note: Account activation may take 3+ business days, as Trolley’s banking partners have varying business registration processes and compliance requirements. In your Tapfiliate account, navigate to Settings → Payments and enable the Trolley integration toggle.
The next step is to create a Trolley account. After submitting your information during signup, a Trolley representative will contact you to complete the account registration process.
If you need assistance, the Trolley team is available to help make the onboarding process as smooth as possible. How to Contact Trolley Support Trolley Subscription Plans
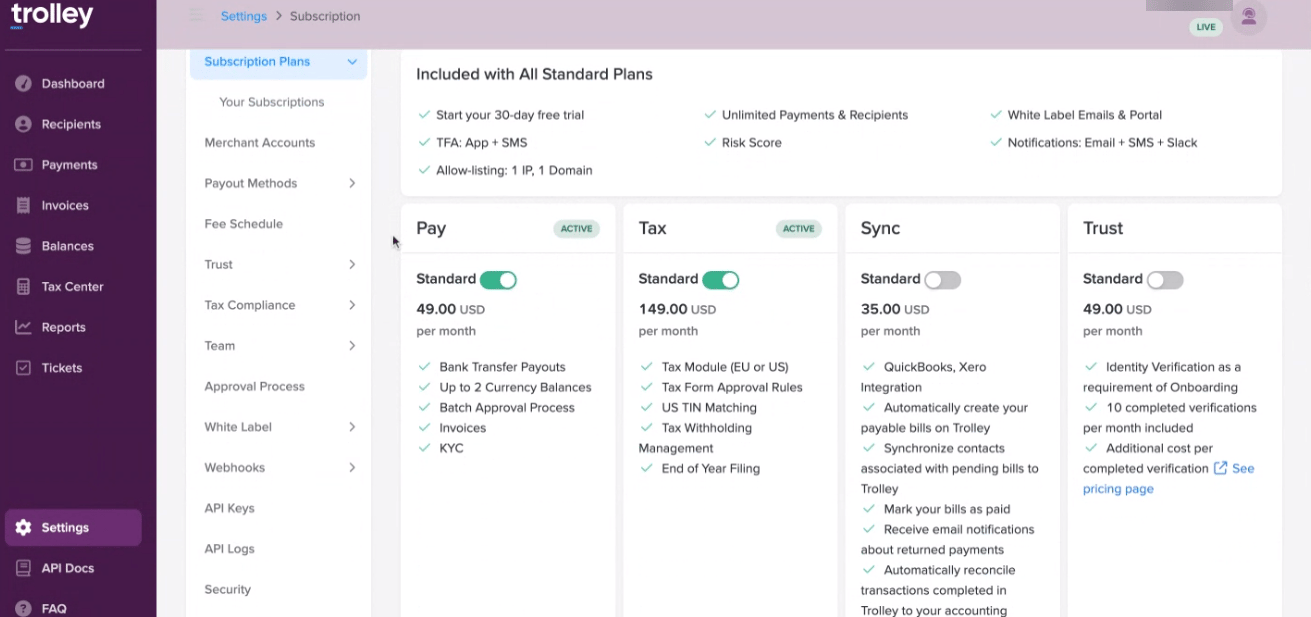
- Standard Pay module: $49/month – for issuing payments only
- Standard Tax module: $149/month – for handling taxes
Once your Trolley account is activated and the onboarding process is complete, you can set up the payment methods you’ll use to manage affiliate payouts through Trolley.
Enable Bank Transfer Payments
- To set up bank transfers as a payout method, log into your Trolley Dashboard and navigate to Settings > Payout Methods, then click “Bank Transfer”.
- On the next Bank Transfer page, activate this payout method by toggling on the “Enabled” (green) option which you can find at the right top corner of the page.
- In the next section, Trolley lists their available payout countries (all countries are enabled by default). We suggest leaving all countries enabled.
- After enabling bank transfers and payout countries, you must fund your Trolley account to send your first batch of payments.
Enable PayPal Payments
To use PayPal for affiliate payouts:
- Log in to your Trolley Dashboard.
- Go to Settings → Payout Methods and click PayPal.
- Enter your PayPal NVP/SOAP API credentials on the next page.
- Activate the payout method by toggling the Enabled switch in the top-right corner of the page (it will turn green when active).
NOTE: There’s an activation process for both the Bank and PayPal methods on Trolley’s side. Here are some helpful guides on the topic:
Activating your Trolley Account (Bank Transfer Onboarding)
Enrolling & Adding PayPal (API)
Enrolling & Adding PayPal (Mass Payments) Important: Before paying your affiliates via bank transfer, make sure your Trolley account has sufficient funds to cover the full payout amount, including any fees you as the merchant are covering. You can check your available balance on the Balances page in your Trolley Dashboard. For instructions on adding funds to your Trolley account to make payouts, see: Adding funds to your account.
To connect Trolley with Tapfiliate, you’ll need to obtain your API keys from Trolley.
- In your Trolley Dashboard, go to Settings → API Keys.
- On the API Keys page, click + Create Production Key in the top-right corner.
- A pop-up window will appear showing your Access Key and Secret Key. Store these safely, as you’ll need them to enter into Tapfiliate.
- In your Tapfiliate account, navigate to Settings → Payments.
- Select Bank Transfer (Automated Payout) and/or PayPal (Automated Payout) as your payment method.
-
Enter your Trolley Access Key and Trolley Secret Key in the corresponding fields to complete the integration.
To generate invoices or W-9 forms, you’ll need to configure tax forms in Trolley.
If you want to use Trolley’s Standard Tax module, first add a tax subscription in your Trolley account and configure your tax settings:
- Go to Settings → Subscription Plans.
-
Toggle the Tax option to activate the module.
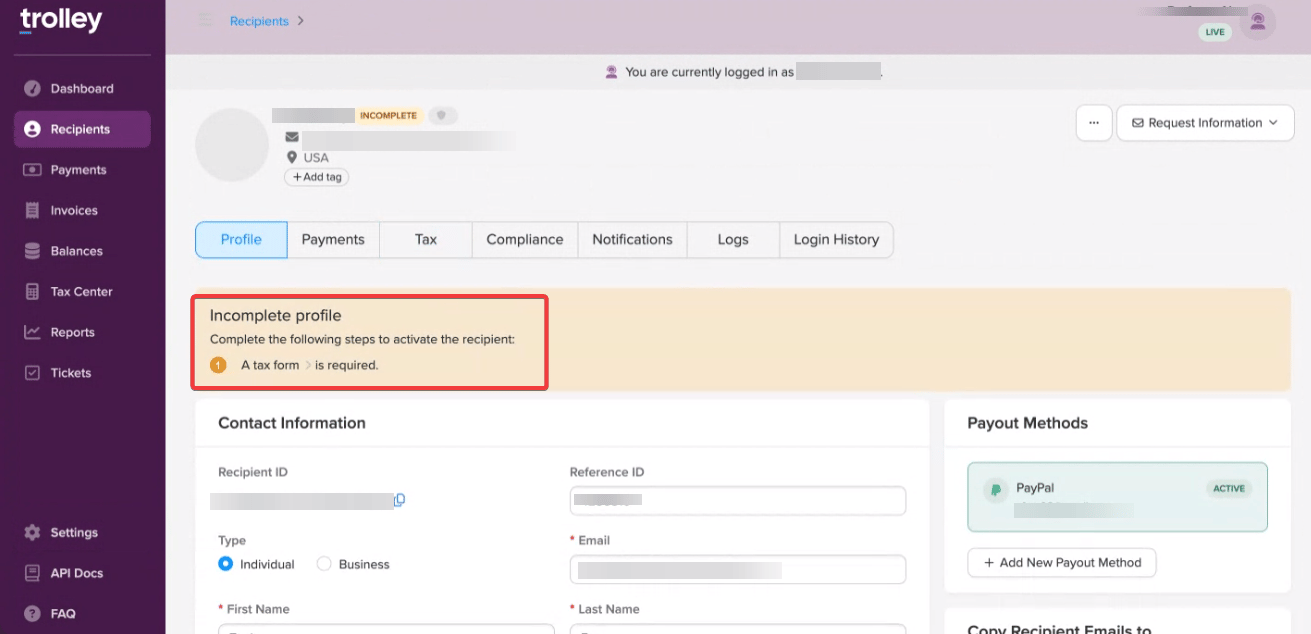
- Navigate to the Recipient tab in Trolley.
- Filter by Latest Tax Form Status = Missing or Incomplete.
- Select the affiliates and click Request Tax Form. This triggers a white-label email directing the affiliate to the portal to submit their tax information.
Share the following steps with your affiliates to set up automated payouts. Once completed, affiliates will be created as recipients in Trolley, allowing their commission payouts to be automated.
-
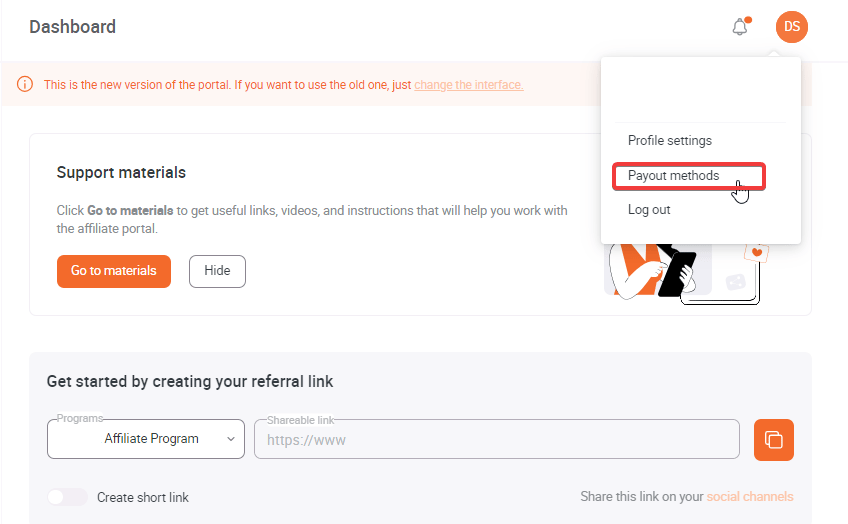
In your Tapfiliate account, go to Settings → Payout Methods → Payout Method.
-
In the window that opens, click Add Payout Method.
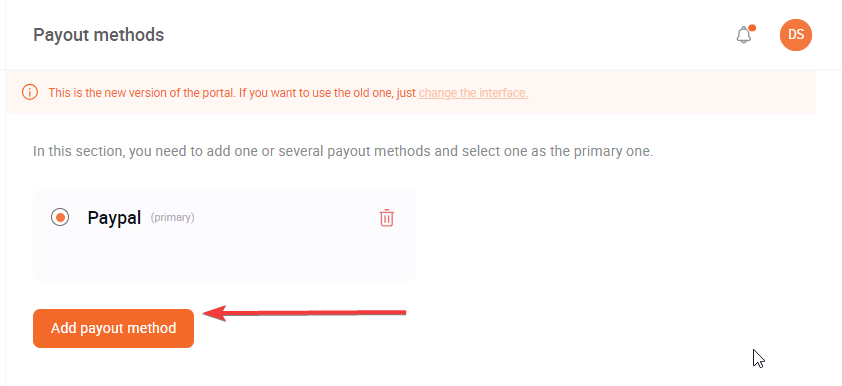
-
Choose Bank Transfer (Automated Payment) or PayPal (Automated Payment).
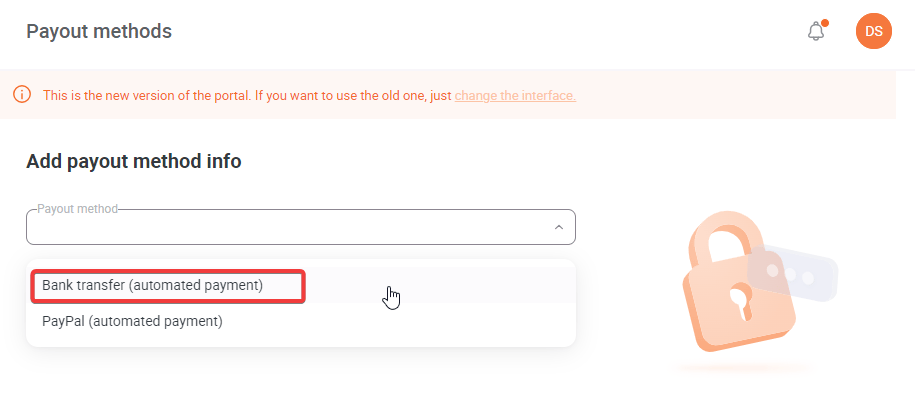
-
Fill in all required fields.
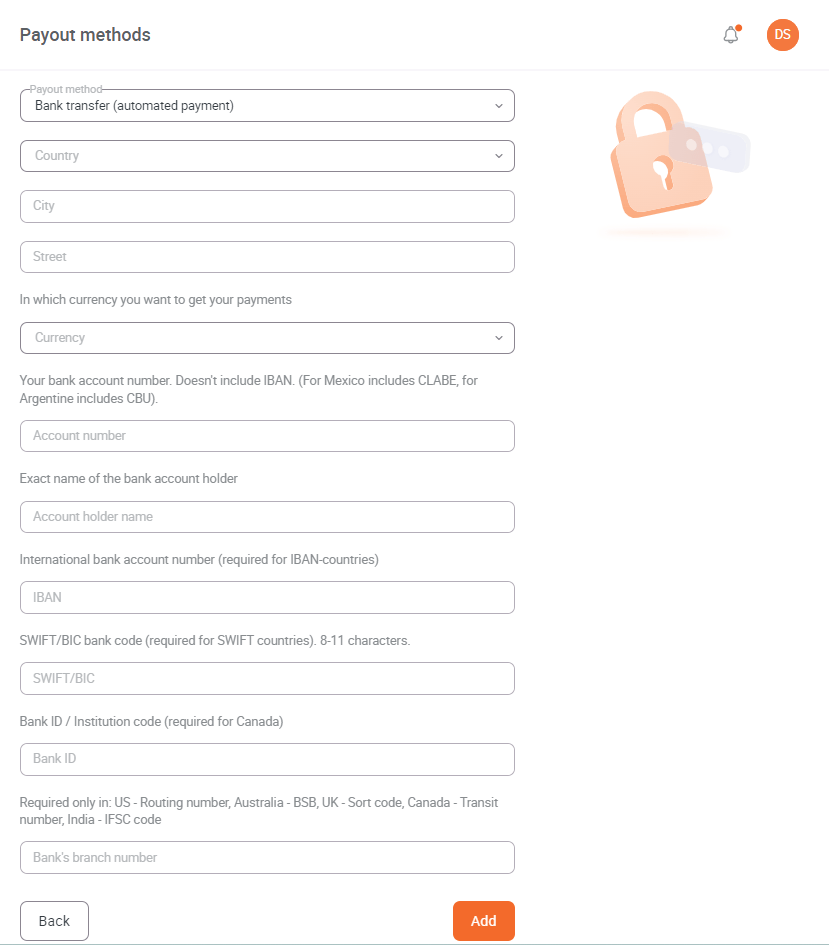
- Pay attention to the hints provided near each field to ensure accuracy.
-
Enter your PayPal account email address.
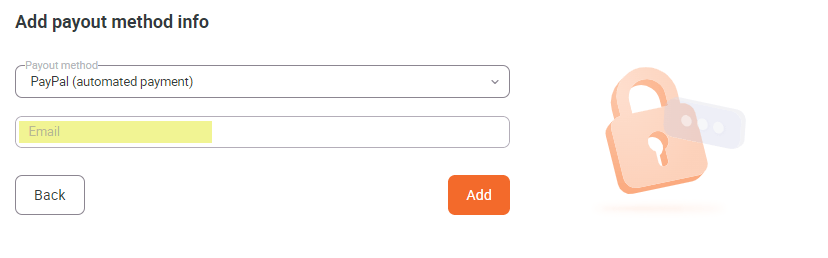
- After completing the payout setup, you will receive an email confirmation.
Once you’ve completed the full integration, you’re ready to pay your affiliates.
In Tapfiliate, go to Payments and choose to settle a single affiliate’s balance or settle all balances. If affiliates have completed the setup for automated payouts, Tapfiliate sends their payout information directly to Trolley. If some affiliates have skipped the setup for automated payouts, Tapfiliate doesn’t send their payout information to Trolley. Trolley allows you to set a minimum payout amount. Affiliates with balances below this threshold will not be paid until their balance reaches the minimum. For more details, see Payment Minimums in the API. Fulfilling payments in Trolley:
- Log in to your Trolley account.
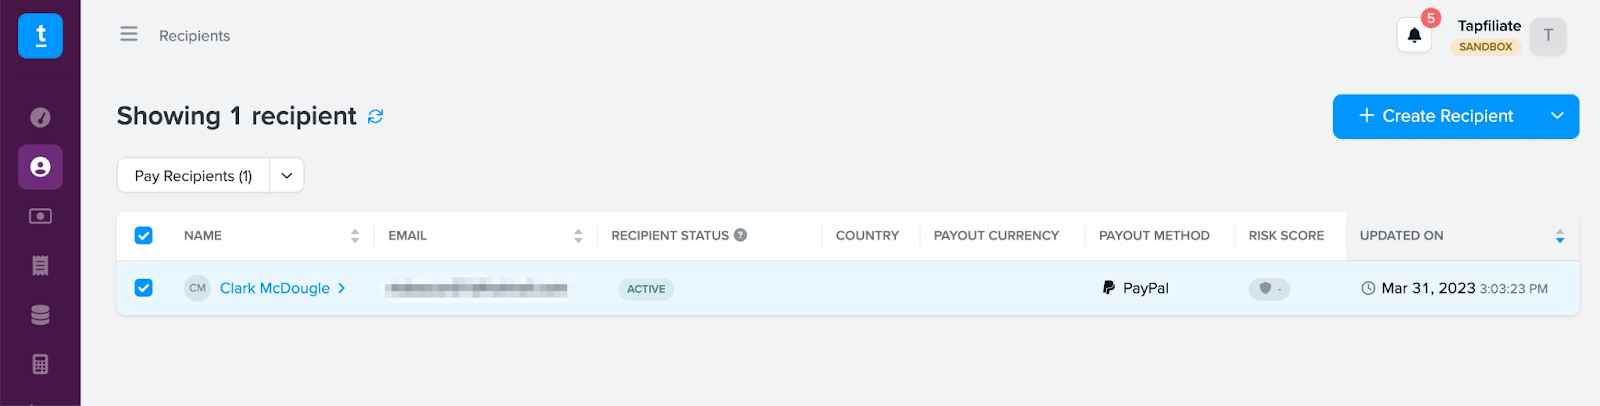
- Go to the Recipients page, select the recipients, and click Pay Recipients.
-
You’ll be directed to the Payments page in Trolley. Follow Trolley’s instructions on creating a payment to complete the process.
❓How do I cancel a payment?
If you need to cancel a Trolley payment, you must:- Manually remove the issued commission in your Trolley account. Find out more about it here.
- Return the amount to the affiliate’s balance in Tapfiliate under Payments. Here’s a detailed article about how to do it.
❓How Long Does It Take to Create a Trolley Account?
Trolley offers a 30-day free trial. Since Trolley is a payment service, it needs to verify your business before you can start using it. After signing up and submitting the required information and documents, account verification can take 3+ business days. Once verified, you can begin integrating Trolley with Tapfiliate.❓Am I eligible for automated payouts?
This integration is available for Scale and Enterprise users only.If you’d like to gain access to this feature, you may upgrade your plan on your Billing page.