November 10, 2026
Table of Contents
- What Is a Postback?
- Before You Start (Requirements)
- How Postbacks Work in Tapfiliate
- Setting Up Tapfiliate Postbacks (Step-by-Step)
- Understanding Content Keys and SubIDs (Clear Example)
- Pause or remove existing postback
- Testing Your Postback
- List of Available Macros (Quick Reference)
- Common Mistakes & Best Practices
What Is a Postback?
A postback is a server-to-server request that Tapfiliate sends to an affiliate’s tracking system when a conversion is recorded. Unlike pixels or browser-based tracking, postbacks are:- More reliable
- Not affected by ad blockers
- Commonly required by affiliate networks
Before You Start (Requirements)
Before setting up a postback, make sure you have:- The postback URL of your tracking system
- A list of the parameters your tracking system expects (for example: click ID, payout, currency)
- The name of the parameter in which your tracking system expects the click ID (e.g.
subid,subid1,click_id)
How Postbacks Work in Tapfiliate
- You send traffic using your Tapfiliate referral link.
- A SubID (click ID) is passed in the link.
- Tapfiliate stores this SubID.
- When a conversion occurs, Tapfiliate fires a postback.
- Your tracking system receives the SubID and matches the conversion to the original click.
Setting Up Tapfiliate Postbacks
You set up postbacks yourself in your affiliate portal. The program owner can also create postbacks for you from their own dashboard.To set up a postback, follow these steps:
1. Open Postbacks in the left menu of your affiliate portal.
2. Click the “Create new postback” button. You need to be approved in at least one program to create a postback.
3. Enter a descriptive title for your postback (e.g., “Sale”).
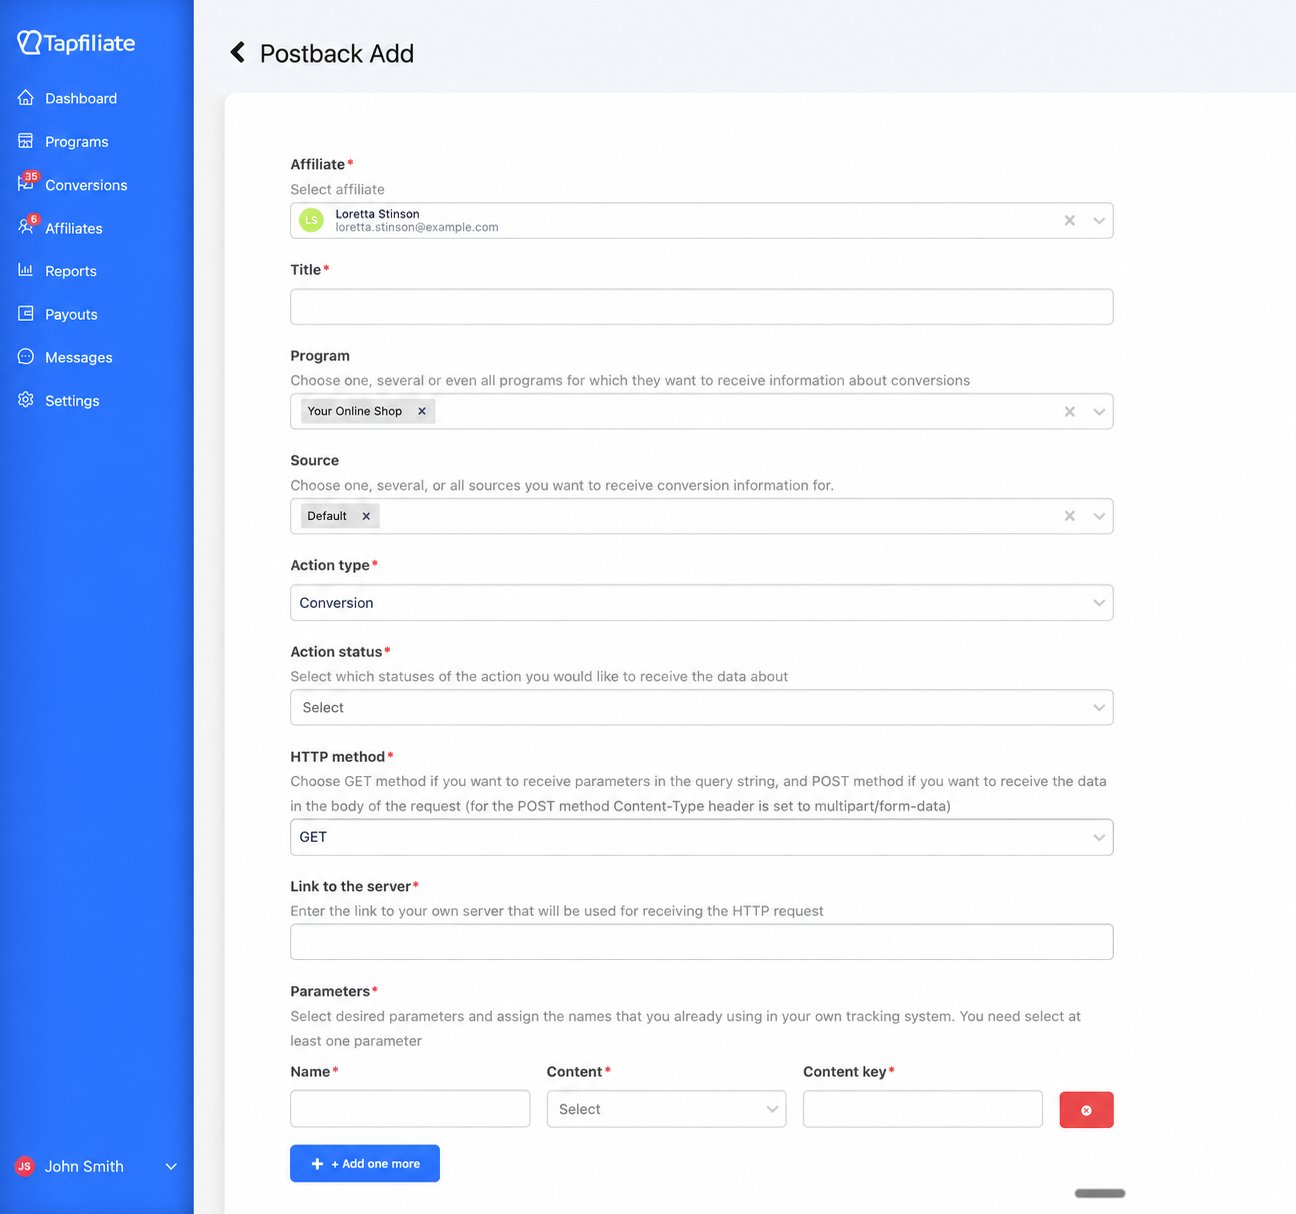
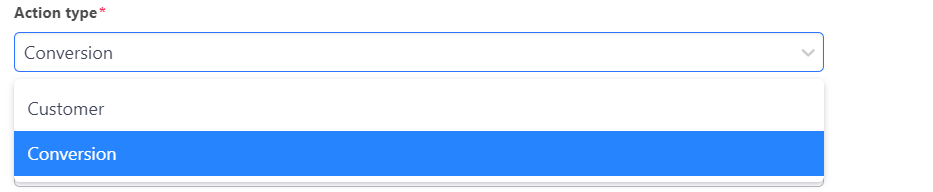
5. Choose the event (Conversion or Customer) and the status: Create to receive data when it is created, Update to receive data when it changes, or both.
7. Add the link to your server:
Paste the HTTPS postback URL of your tracking system.
Example: https://affiliate-network.com/postback
8. Add Parameters:
For each parameter, enter the Name your tracking system expects and choose the Tapfiliate macro in Content. Click ”+ Add one more” to add another parameter.
Example (name = content):
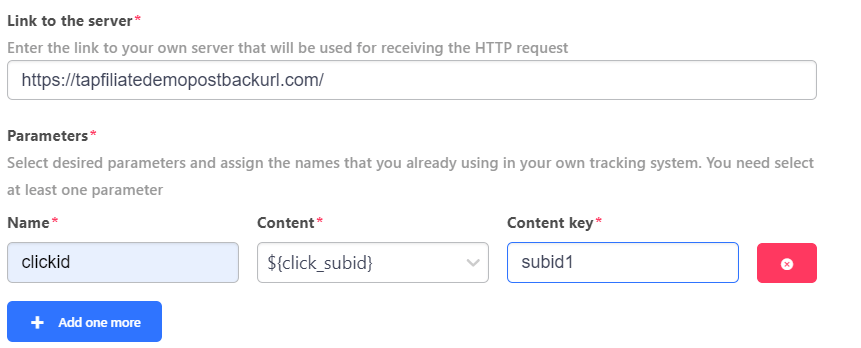
Once you have saved the postback, Tapfiliate will automatically send a request to your server whenever the chosen event happens. You can then use this data to track your earnings and measure the success of your promotional efforts.
Understanding Content Keys and SubIDs (Clear Example)
This section clarifies one of the most commonly misunderstood concepts.Scenario
- You send traffic using this referral link:
- Here, you are passing the click ID in
tm_subid1.
What Happens in Tapfiliate
- Tapfiliate stores the value
ABC123. - Internally, this value is available as the macro
${click_subid}.
What Is the Content Key?
The content key tells Tapfiliate which SubID parameter name should be sent back to you.In this example:
- You send the click ID in:
tm_subid1 - Content key should be set to:
subid1
Resulting Postback
When the conversion happens, Tapfiliate sends:subid1=ABC123This allows your tracking system to correctly match the conversion to the original click.
Receiving the external id
You can receive the external id of the conversion in your postback by using the ${conversion_external_id} macro. Example screenshot of how you can add the external id to the postback is given below: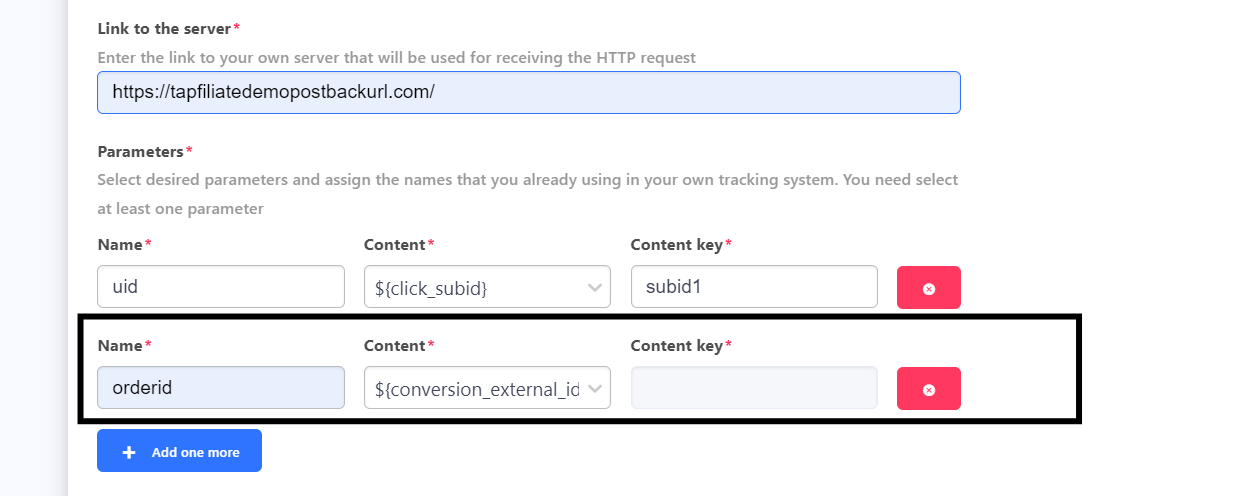
Pause or remove existing postbacks
Once you’ve created postbacks, you can edit, pause, or remove them as needed. Here’s how:1. Accessing the Postback Section:
- Log in to your affiliate portal.
- Open Postbacks in the left menu.
The Postbacks tab displays a list of all postbacks you’ve created. Each postback shows its title, link to server, programs, sources, event, status, HTTP method and parameters.
3. Editing a Postback:
- Locate the postback you want to modify in the list.
- Click the edit (pencil) icon next to it.
- This opens the edit form, where you can change the title, programs, sources, event, status, HTTP method, link to server, or parameters.
- Once you’ve made the necessary edits, click the “Save” button to apply the changes.
- To temporarily disable a postback, locate it in the list.
- Click the activate/deactivate icon next to the postback. This will switch the postback to an inactive state.
- An inactive postback does not send any requests until you activate it again.
- If you no longer need a particular postback, you can delete it permanently.
- Locate the postback you want to remove in the list.
- Click the trash can icon next to it.
- A confirmation dialog will appear. Click “Delete” to confirm the removal.
Testing Tapfiliate Postbacks
It’s important to properly manage and test your Tapfiliate postbacks to ensure they are functioning correctly. Here are some tips:- Test your postbacks: Before launching your affiliate campaign, it’s essential to test your postbacks to make sure they are sending data correctly. You can do this with the Test button in the “Test postback” block of the postback form: it sends a test request to your server and shows the response.

List of Available Macros (Quick Reference)
Here is the full list of macros you can use in a Tapfiliate postback. Dates are sent in ISO 8601 format (for example2026-11-04T17:19:36+00:00) in the time zone set in your account. Amounts are sent as a number with two decimals and no currency symbol (for example 49.90).
Conversion macros are empty in postbacks for customer events. Always check which parameters your tracking system expects.
Troubleshooting and best practices
Scenario: An affiliate sets up their Tapfiliate account and configures a postback using a click sub‑ID (viatm_subid1‑tm_subid10) in their referral links. However, when a conversion occurs, they never receive their click ID back in the postback payload—breaking the tracking.Cause:
The advertiser might be using Tapfiliate’s REST API for click and conversion tracking—but they only might be sending basic data when creating a click (e.g.,
referral_code), not storing or forwarding the affiliate’s sub‑ID metadata (like click_id) in the conversion API call. Because of these reasons, Tapfiliate cannot include that sub-ID in the postback (using ${click_subid}), so it never reaches the affiliate.Resolution:
Reach out to the advertiser to make sure their REST integration carries forward the affiliate sub‑ID metadata from the click through to the conversion call:
-
When creating the click, the advertisers must include the affiliate’s sub-id metadata: (example body)
- Store the click ID and metadata in a cookie or session so it’s available at conversion time.
- When sending the conversion, include the same metadata.
Common Mistakes & Best Practices
Common Mistakes
- Sending unnecessary or sensitive data
- Using HTTP instead of HTTPS
- Incorrect SubID/content key mapping
- Not testing the postback
Best Practices
- Always use HTTPS endpoints
- Send only required parameters
- Clearly document SubID usage with affiliates